From inside (document excerpt):
Brother Laser Multifunction Center MFC-8500 user’s guide. Free PDF Service and Owner’s Manual Download.
Toner cartridge for Brother Printer: TN-430 (Able to print 3000 pages) TN-460 (Able to print 6000 pages) DR400 LG3077001 UF6857010 UF7204008 UU2069008 UU2080008 F2A046-10 LT400 QPD120 FX 120 LE1762001
Contents
Introduction. 1-1
Using This Manual. 1-1
Finding Information. 1-1
Conventions Used in this Manual. 1-1
Test Sheet Procedure and Product Registration
(For USA Only). 1-2
To Complete Your MFC-8500 Registration On-Line (For USA Only). 1-2
MFC-8500 Control Panel Overview. 1-3
About Fax Machines. 1-5
Custom Features. 1-5
Do You Have Voice Mail on the Phone Line?. 1-5
Why Should There Be Trouble?. 1-5
How Can You Avoid Possible Problems?. 1-5
Fax Tones and Handshake. 1-6
ECM (Error Correction Mode). 1-6
Assembly and Connections. 2-1
Packing List. 2-1
Choosing a Location. 2-2
Assembly. 2-3
Installing the Drum Unit Assembly
(with Toner Cartridge). 2-3
Attaching the Trays. 2-4
Connecting Paper Cassette #2 (Option). 2-4
Manual Feed Slot. 2-5
Paper. 2-6
Acceptable Paper. 2-6
Paper Capacity of Paper Cassette. 2-6
Paper Specification for the Cassette. 2-7
Manual Feed Slot. 2-7
Loading Paper in Multi-purpose Paper Cassette. 2-8
Connections. 2-9
Connecting the Machine. 2-9
Connecting an External Telephone. 2-10
Connecting an External TAD
(Telephone Answering Device). 2-10
Sequence. 2-10
Connections. 2-10 Recording Outgoing Message (OGM) on
External TAD. 2-11 Special Line Considerations. 2-12 Roll Over Phone Lines. 2-12 Two-Line Phone System. 2-12 Converting Telephone Wall Outlets. 2-12 Installing Machine, External Two-Line TAD, and Two-Line Telephone. 2-13 Multi-Line Connections (PBX). 2-14 If you are installing the machine to work with a PBX:. 2-14 Custom Features on Your Phone Line. 2-14 Custom Features on a Signal Line. 2-14
On-Screen Programming. 3-1
User-Friendly Programming. 3-1
Menu Mode. 3-1
Menu Selection Table. 3-2
Initial Setup. 4-1
Getting Started. 4-1
Setting Paper Size. 4-1
Turning on Cassette #2 (Option). 4-1
Setting Cassette Usage. 4-2
Setting Date and Time. 4-2
Setting Station ID. 4-3
Entering Text. 4-3
Inserting Spaces. 4-4
Making Corrections. 4-4
Repeating Letters. 4-4
Special Characters and Symbols. 4-4
Setting the Ring Volume. 4-5
Setting the Beeper Volume. 4-5
Setting the Speaker Volume. 4-5
Setting the Handset Volume. 4-6
Choosing the Handset Volume (For Volume Amplify). 4-6
Setting Volume Amplify (For the Hearing-Impaired). 4-7
Memory Storage. 4-7
Turning On Automatic Daylight Savings Time. 4-7
Toner Save. 4-8
Sleep Mode. 4-8
Setting Tone/Pulse Dialing Mode (For Canada Only). 4-8
Setup Receive. 5-1 5
Basic Receiving Operations. 5-1
Selecting Receive Mode. 5-1
Setting Ring Delay. 5-2
Setting F/T Ring Time (For FAX/TEL Mode Only). 5-2
Easy Receive. 5-3
Printing a Reduced Incoming Document. 5-3
Setting the Print Density. 5-4
Advanced Receiving Operations. 5-5
Operation from Extension Telephone or External Telephone. 5-5
For FAX/TEL Mode Only. 5-5
Changing Remote Codes. 5-5
Printing a Fax in Memory. 5-6
Polling. 5-6
Setting Up Polling Receive. 5-7
Setting Up Sequential Polling Receive. 5-7
Canceling a Scheduled Job. 5-8
Setting Multi-Function Link® Pro Mode. 5-8
Setup Send. 6-1
Before You Begin. 6-1
Using the ADF (Automatic Document Feeder). 6-1
Sending Faxes with Multiple Settings. 6-2
Manual Transmission. 6-2
Automatic Transmission. 6-2
Manual and Automatic Fax Redial. 6-2
Dual Access. 6-3
Real Time Transmission. 6-3
Checking the Jobs Status. 6-4
Canceling a Job While Scanning the Document. 6-4
Canceling Jobs in Memory. 6-4
Basic Sending Operations. 6-5
Contrast. 6-5
Fax Resolution. 6-5
Composing Electronic Cover Page. 6-6
Composing Your Own Comments. 6-7
Cover Page for the Next Fax Only. 6-7
Always Send Cover Page. 6-8
Using a Printed Cover Page. 6-8 Advanced Sending Operations. 6-9 Overseas Mode. 6-9 Delayed Timer. 6-9 Delayed Fax. 6-10 Delayed Batch Transmission. 6-10 Setting Up Polling Transmit. 6-11
Auto Dial Numbers and Dialing Options. 7-1
Storing Numbers for Easy Dialing. 7-1
Storing One Touch Dial Numbers. 7-1
Storing Speed Dial Numbers. 7-2
Changing One Touch and Speed Dial Numbers. 7-2
Setting Up Groups for Broadcasting. 7-3
Dialing Options. 7-4
Manual Dialing. 7-4
Search. 7-4
Speed Dialing. 7-5
One Touch Dialing. 7-5
Broadcasting. 7-6
Access Codes and Credit Card Numbers. 7-7
Pause. 7-7
Hold. 7-7
Redial. 7-7
Tone/Pulse (For Canada Only). 7-7
8
Telephone Services. 8-1
Custom Features. 8-1
Distinctive Ring. 8-1
What Does Your Telephone Company’s
“Distinctive Ring” Do?. 8-1
What Does Brother’s “Distinctive Ring” Do?. 8-1
Do You Have Voice Mail?. 8-2
Before You Choose the Ring Pattern to Register. 8-2
VERY IMPORTANT. 8-3
Registering the Distinctive Ring Pattern. 8-3
Caller ID. 8-3
Viewing Caller ID List. 8-4
Clearing a Caller ID Stored in Memory. 8-4
Printing Caller ID List. 8-4
Call Waiting Caller ID. 8-4
CallManage (For USA Only). 8-5
Registration with CallManage Requires Changing Your Carrier Selection. 8-5
Sending a Fax Using CallManage (For Domestic and International Long Distance Calls Only!). 8-6
Placing a Long Distance Telephone Call Using CallManage. 8-6
Customer Support. 8-6
Disclaimer. 8-6
Remote Fax Options. 9-1
Fax Forwarding/Paging. 9-1
Programming a Fax Forwarding Number. 9-1
Programming a Paging Number. 9-2
Setting Fax Storage. 9-3
Backup Print. 9-3
Changing Remote Retrieval Access Code. 9-3
Remote Retrieval. 9-4
Using Remote Retrieval Access Code. 9-4
Remote Commands. 9-5
Retrieving Fax Messages. 9-6
Changing Fax Forwarding Number. 9-6
Printing Reports. 10-1
MFC Settings and Activity. 10-1
Customizing the Transmission Verification Report. 10-1
Setting the Fax Activity Report Interval. 10-1
Using the Reports Key. 10-2
To Print a Report. 10-2
Making Copies. 11-1
Using Your Machine as a Copier. 11-1
Making a Single Copy. 11-1
Making Multiple Copies. 11-1
Out of Memory Message. 11-1
Temporary Copy Settings. 11-2
Copying Using Multiple Settings. 11-2
Using the Enlarge and Reduce Keys. 11-3
Using the Options Key. 11-4
Copy Mode (Type of Original). 11-4
Copy Contrast. 11-4
Sorting Multiple Copies. 11-5
Special Copy Options. 11-5
Changing Default Copy Settings. 11-6
Copy Mode (Type of Original). 11-6
Copy Contrast. 11-6
For DOS Users. 12-1
How to Use the Brother Machine with Your DOS Application Software. 12-1
What Does the Remote Printer Console Do?. 12-1
Remote Printer Console Main Program. 12-1
Installing the Remote Printer Console. 12-2
Using the Remote Printer Console Main Program. 12-3
Remote Printer Console. 12-4
Current Printer Status Information. 12-4
Printer Setup Category. 12-4
Print Setup Section. 12-4
Page Setup Section. 12-5
Font Configuration. 12-5
Other Configuration. 12-6
Console Configuration Category. 12-6
Using Brother Machine as a Printer. 13-1
Special Printing Features. 13-1
Windows® Printing. 13-1
Popular Printer Emulation Support. 13-1
Remote Printer Console Program for DOS. 13-1
Bi-directional Parallel Interface. 13-1
Enhanced Memory Management. 13-1
Printing from Your PC. 13-2
Multi-purpose Paper Cassette. 13-2
Two-Sided Printing (Manual Duplexing). 13-2
Front Output Bin. 13-3
Manual Feed Slot. 13-3
Loading One Sheet of Paper. 13-4
Loading More than One Sheet of Paper. 13-4
Printing on Thicker Paper and Card Stock. 13-5
Simultaneous Printing/Faxing. 13-6
Choosing Acceptable Paper. 13-6
Printer Operations. 13-7
Reset Key. 13-7 Printing the Internal Font List. 13-7 Printing the Print Configuration List. 13-7 Restoring Factory Default Settings. 13-7
Printer Driver Settings (For Windows® Only). 14-1
Using the Brother MFC-8500 Printer Driver. 14-1
Features in the PCL Printer Driver
(For Windows® Users Only). 14-1
Basic Tab. 14-2
Paper Size. 14-3
Multiple Page. 14-3
Border Line. 14-3
Orientation. 14-3
Copies. 14-3
Collate. 14-4
Media Type. 14-4
Advanced Tab. 14-5
Print Quality. 14-5
Resolution. 14-5
Toner Save. 14-5
Print Setting
(For Windows® 95/98/98SE/Me Users Only). 14-6
Duplex Printing. 14-6
Manual Duplex. 14-6
Binding Offset. 14-6
Watermark. 14-7
Print Watermark. 14-7
In background. 14-7
Watermark Text. 14-8
Watermark Bitmap. 14-8
Position. 14-8
Page Setting. 14-9
Device Options. 14-10
Quick Print Setup. 14-11
Administrator
(For Windows® 95/98/98SE/Me Users Only). 14-11
Print Date & Time. 14-12
Accessories Tab. 14-13
Paper Source Setting. 14-13
Default Source. 14-13
Available Options. 14-13
Support. 14-14
Brother Solutions Center. 14-14
Web Update. 14-14
Check Setting. 14-14
Features in the Printer Driver (For Windows® 2000). 14-15
General Tab. 14-15
Printing Preferences. 14-15
Layout Tab. 14-16
*1 Orientation. 14-16
*2 Pages Per Sheet. 14-17
Paper/Quality Tab. 14-17
*1 Paper Source. 14-17
*2 Media. 14-18
Advanced Options. 14-18
*1 Paper /Output. 14-18
*2 Graphic. 14-19
*3 Document Options. 14-19
Device Settings Tab. 14-20
Installable Options. 14-20
Using the Windows®-Based Brother MFL-Pro Control Center. 15-1
Brother Control Center. 15-1
AutoLoad the Brother Control Center. 15-1
How to Turn Off AutoLoad. 15-2
Using the Scan Keys. 15-2
Using the Control Panel Keys. 15-2
Scan Image. 15-3
Scan/OCR. 15-3
Scan to E-mail. 15-3
Brother Control Center Features. 15-4
Auto Configuration. 15-4
Scanning Operations. 15-4
Copy Operations. 15-5
PC Fax Operation. 15-5
Scanner Settings for Scan, Copy and PC Fax Buttons. 15-5
Global Settings. 15-5
Setting Up the Scanner Configurations. 15-6
To Access the Scanner Configuration Screen:. 15-6
Perform an Operation from the Control Center Screen. 15-6
Scan to File. 15-7
Scanner Settings. 15-7 Destination Folder. 15-8 Scan to E-mail. 15-8 Scanner Settings. 15-9 E-mail Application. 15-9 File Attachments. 15-9 Conversion Options. 15-10 Format. 15-10 Show QuickSend Menu. 15-10 QuickSend List. 15-10 Scan to Word Processor. 15-11 Scanner Settings. 15-11 Word Processor. 15-12 User-Defined Button. 15-13 Scanner Settings. 15-13 Target Application. 15-13 Copy. 15-14 Scanner Settings. 15-14 Copy Settings. 15-14 Send a Fax. 15-15 Scanner Settings. 15-15 Fax Settings. 15-15
16
Using ScanSoft™ PaperPort® for Brother and ScanSoft™
TextBridge®. 16-1
Using ScanSoft™ PaperPort® and TextBridge®. 16-1
Viewing Items in ScanSoft™ PaperPort® for Brother. 16-2
Organizing Your Items in Folders. 16-2
Links to Many Other Applications. 16-3
Using ScanSoft™ TextBridge® OCR
(Converting Image Text to Text You Can Edit). 16-3
Importing Items from Other Applications. 16-3
Exporting Items in Other Formats. 16-4
Exporting an Image File. 16-4
Accessing the Scanner. 16-4
Scanning a Document into Your PC. 16-5
Settings in the Scanner Window. 16-5
Image. 16-5
Contrast. 16-6
Custom. 16-6
PreScanning an Image. 16-7
xvii
17
Setting Up and Using PC FAX (For Windows® Only). 17-1
Introduction. 17-1
Brother Resource Manager. 17-1
MFC Remote Setup. 17-2
PC FAX Sending (For Windows® Only). 17-3
Setting Up User Information. 17-3
Setting Up Sending. 17-4
Outside line access. 17-4
Include header. 17-4
Address Book file. 17-4
User interface. 17-5
Simple Style. 17-5
Facsimile Style. 17-5
Setting Up Speed Dial. 17-6
The Address Book. 17-7
Setting Up a Member in the Address Book. 17-8
Setting Up a Group for Broadcasting. 17-9
Editing Member Information. 17-9
Deleting a Member or Group. 17-10
Exporting the Address Book. 17-10
Importing to the Address Book. 17-11
Setting Up Cover Page. 17-12
To. 17-13
From. 17-13
Comment. 17-13
Select Cover Page Form. 17-13
Import BMP file. 17-13
Count Cover Page. 17-13
Sending a File as a PC-FAX Using the Simple Style. 17-14
Sending a File as a PC-FAX Using the Facsimile Style. 17-15
Setting Up PC FAX Receiving. 17-16
Setting Up Your MFC. 17-16
Running PC FAX Receiving. 17-16
Setting Up Your PC. 17-17
Viewing New PC FAX Messages. 17-17
18
Using Automatic E-Mail Printing. 18-1
For Windows® 95, 98, 98SE, Me Only. 18-1
Main Features. 18-1
To Access the On-Line Documentation. 18-1
To Install Automatic E-mail Printing (Optional Application):18-1
Using the Brother MFC with a New Power Macintosh® G3, G4 or iMac™/iBook. 19-1
Set up Your USB Equipped Apple® Macintosh® G3,G4, iMac™ or iBook with Mac OS 8.5/8.51/8.6/9.0/9.0.4/9.1. 19-1
Using Brother Printer Driver with Your Apple® Macintosh®. 19-1
Sending a Fax from Your Macintosh® Application. 19-3
Setting Up Your Address Book. 19-5
Adding a New Member. 19-5
Adding a New Group. 19-6
Using Brother TWAIN Scanner Driver with Your Apple® Macintosh®. 19-7
Accessing the Scanner. 19-8
Scanning a Document into Your Macintosh G3, G4 or iMac. 19-8
Settings in the Scanner Window. 19-9
Image. 19-9
Scanning Area. 19-9
Business Card Size. 19-10
Miscellaneous. 19-10
Contrast. 19-10
PreScanning an Image. 19-11
Optional Accessories. 20-1
Paper Cassette #2 (Option). 20-1
Important Information. 21-121
Standard Telephone and FCC Notices. 21-1
Laser Safety. 21-2
FDA Regulations. 21-2
Manufactured. 21-2
Important—About the Interface Cable. 21-3
Federal Communications Commission (FCC)
Declaration of Conformity (For USA Only). 21-3
Important. 21-4
Industry Canada Compliance Statement
(For Canada Only). 21-4
Warranty. 21-4
International ENERGY STAR® Compliance
Statement. 21-4
Important Safety Instructions. 21-4
Trademarks. 21-6
Troubleshooting and Routine Maintenance. 22-1
Troubleshooting. 22-1
Error Messages. 22-1
Document Jam. 22-4
Paper Jam. 22-4
Paper is Jammed in the Multi-purpose Paper Cassette. 22-5
Paper is Jammed near the Drum Unit. 22-5
Paper is Jammed in the Fuser Unit. 22-5
If You Are Having Difficulty with Your Machine. 22-6
Packing and Shipping the Machine. 22-13
Routine Maintenance. 22-16
Cleaning the Document Scanner. 22-16
Cleaning the Printer. 22-16
Cleaning the Drum Unit. 22-17
Replacing the Toner Cartridge. 22-18
Toner Empty Indicator. 22-18
Replacing the Drum Unit. 22-21
Checking the Drum Life. 22-22
23 Glossary. G-1
24 Specifications. S-1
Product Description. S-1
Fax. S-1
Printer. S-2
Computer Requirement. S-3
Electrical and Environment. S-3
Parallel Interface Specifications. S-4
USB (Universal Serial Bus) Interface Specifications. S-4
Resident Fonts. S-4
Symbol Sets/Character Sets. S-5
Index
A
access codes for dialing, storing 7-7 accessories and supplies ii
ADF (automatic document feeder) 6-1 assembly 2-3
document tray 2-4
document wire 2-4
drum unit assembly 2-3
grounded three-prong plug 2-9 handset 2-9
loading paper 2-8
power cord 2-9
telephone line code 2-9
Toner Cartridge 2-3
automatic
dialing 7-5
fax receive 5-1
fax redial 6-2
transmission 6-2
B
Broadcasting 7-6
setting up Groups for 7-3
Brother
accessories and supplies ii
Brother numbers i
Customer Service i
fax-back system i
Test Sheet, sending 1-2
warranties
Canada vi
Notice-Disclaimer of Warranties iii USA iv, v
Brother Control Center
using and configurating 15-1 to 15-15
C
Call Waiting Caller ID 8-4 Caller ID 8-3
CallManage 8-5
canceling
Fax Forwarding 9-1, 9-5, 9-6 fax jobs in memory 5-8
jobs awaiting redial 6-4
Paging 9-5
Connecting
Multi-line (PBX) 2-14
control panel 1-3
converting telephone wall outlets 2-12
Copy
contrast 11-6
default settings 11-6
keys 11-1
Copy Settings 11-2
copy(ies)
enlarging 11-3
multiple 11-1
photographs 11-4, 11-6
quality 22-8
reducing 11-3
single 11-1
sorting 11-5
temporary settings 11-2
cover page
composing 6-6
custom comments 6-7
for all faxes 6-8
for next fax only 6-7
printed form 6-8
credit card numbers, storing 7-7
custom telephone features 2-14, 22-8
D
date and time, setting 4-2
delayed fax, sending 6-10
dialing
access codes 7-7
automatic fax redial 6-2 credit card numbers 7-7 Groups 7-6
One Touch numbers 7-5 pulse (rotary) (for Canada) 7-7 Speed Dial numbers 7-5 document jam 22-4
Drivers
Windows printing 13-1
drum unit
cleaning 22-17
installing 2-3
life remaining 22-22
replacing 22-21
Dual Access 6-3
E
Easy Receive 5-3
ECM (Error Correction Mode) 1-6 entering text 4-3
envelopes
printing 13-2
sizes 2-6
error messages on LCD 22-1 to 22-3
CHECK PAPER 22-1
COMM. ERROR 22-1
NOT REGISTERED 22-2
OUT OF MEMORY 22-2
while scanning a document 11-1 extension telephones, using 5-5 external telephone connecting 2-10
F
fax codes
Fax Receive Code 5-5
Remote Retrieval Access Code 9-3 Telephone Answer Code 5-5 troubleshooting 5-5
Fax Forwarding
changing remotely 9-5, 9-6 programming a number 9-1
Fax Storage
printing from 5-6
setting 9-3
fax(es), stand-alone
receiving 5-1
difficulty 22-6
erasing from memory 9-5 forwarding 9-1, 9-5
polling 5-6
reducing to fit on paper 5-3
sending 6-5
automatic fax redial 6-2
automatic transmission 6-2 Broadcasting 7-6
canceling from memory 6-4 contrast setting 6-5
delayed 6-10
from memory (Dual Access) 6-3 in real time 6-3
manual transmission 6-2
overseas 6-9
polling 6-11
resolution 6-5
FAX/TEL mode 5-2
answering at extension phones 5-5 double-ringing (voice calls) 5-2 receiving faxes 5-5
Ring Delay, setting 5-2
fax-back system i
FCC Notices 21-1
G
gray scale S-1
Groups
dialing 7-6
setting up 7-3
I
Importing 16-3
J
jack(s)
triplex adapter 2-12
L
LCD (Liquid Crystal Display) 3-1
M
Macintosh® G3, G4 or iMac™ 19-1 maintenance, routine 22-16
manual
mode 5-1
transmission 6-2
manual feed slot 2-6
Menu mode
programming at a glance 3-1
Menu table 3-2
Multi-Function Link® Pro
MF Link mode, turning on 5-8 printing 13-1
driver 13-1
receiving faxes
if you are having diffculty 22-6 sending faxes
if you are having diffculty 22-7
multi-purpose sheet feeder 2-8
O
OCR (ScanSoft™ TextBridge®) 16-1 One Touch numbers
accessing with Shift key 7-1 changing 7-2
dialing 7-5
storing 7-1
On-Screen Programming 3-1
Options Key Using
Special Copy Options 11-4
overseas, sending faxes 6-9
P
packing list 2-1
Paging
programming a number 9-2
paper
size 2-6, 4-1
specifications S-1
paper jam 22-4
PaperPort 16-1
PaperPort® for Brother
exporting an image file 16-4 prescanning an image 16-7
scanning into PC
accessing 16-4
exporting 16-4
importing 16-3
settings 16-5
uninstall 16-1
viewing faxes and files 16-2
pause 7-7
PC FAX (For Windows®) 17-3 sending
address book 17-7
cover page 17-12
facsimile style 17-15
group 17-9
setting up 17-3
simple style 17-14
polling
receiving 5-7
sending 6-11
sequential receiving 5-7
power
cord 2-9
electrical outlet 2-9
failure 4-7
printer
cleaning 22-16
emulation 13-1
jam 22-4
Printer Driver 14-1
printing 13-1
density 5-4
difficulties 22-6
PC software settings 13-1
quality 22-10
resolution S-2
specifications S-2
speed S-2
two-sided (manual duplexing) 13-2
R
Real Time Transmission 6-3
receive mode 5-1
FAX 5-1
FAX/TEL 5-1
MANUAL 5-1
TAD, external 2-10, 5-1
redial 6-2, 7-7
reducing
copies 11-3
long faxes 5-3
remote codes for extension phones 5-5 remote fax options 9-1
remote printer console 13-1
remote retrieval 9-4
access code
changing 9-3
using 9-4
commands 9-5
getting your faxes 9-6
remote retrieval access code 9-4
reports 10-1
resolution
fax (standard, Fine, Super Fine, Photo) S-1
printing S-2
scanning 16-5
setting for next fax 6-5
rings, setting number of 5-2
roll over phone lines 2-12
S
Safety Instructions 21-4
scanner, cleaning 22-16
Scanning into PC
OCR 16-3
ScanSoft™ PaperPort 16-1 Search 7-4
simultaneous printing/fax 13-6 Sleep mode 4-8
Software
for DOS users 12-1
using
Brother Control Center 15-1 ScanSoft™ Paper Port® 16-1 software
using
ScanSoft™ PaperPort® TextBridge® OCR 16-1
Speaker
Volume 4-5
Speed Dial
changing 7-2
dialing 7-5
storing 7-2
Station ID (fax header) 4-3
Federal regulation 4-4
T
TAD (telephone answering device), external connecting 2-10
receive mode 5-1
recording outgoing message 2-11
Telephone Answer Code 5-5
timer 6-9
toner cartridge
installing 2-3
replacing 22-18
toner save 4-8
Transmission Verification Report 10-2 transparencies 2-5
troubleshooting
document jam 22-4
error messages on LCD 22-1
if you are having difficulty
DOS setup printing 22-9
incoming calls 22-7
paper handling 22-10
phone line connections 22-6
printer difficulties 22-8
printing or receiving faxes 22-6 sending faxes 22-7
Windows® setup printing 22-9
two-line phone system 2-12, 2-13 converting wall jacks 2-12
V
video capture to PC 16-1
Voice calls
FAX/TEL (double-ring) 5-2
voice mail
Volume, setting
beeper 4-5
handset 4-6
amplify (for Hearing-impaired) 4-7 ring 4-5
speaker 4-5
W
Warranties
Canada vi
Notice of Disclaimer iii USA iv, v
Windows® 13-1
Wikipedia’s page for Brother Industries
Publisher: www.brother-usa.com


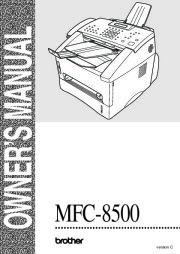 Brother MFC-8500 Laser Multifunction Center Users Guide - 1 of 234
 Brother MFC-8500 Laser Multifunction Center Users Guide - 2 of 234
 Brother MFC-8500 Laser Multifunction Center Users Guide - 3 of 234
 Brother MFC-8500 Laser Multifunction Center Users Guide - 4 of 234
 Brother MFC-8500 Laser Multifunction Center Users Guide - 5 of 234
 Brother MFC-8500 Laser Multifunction Center Users Guide - 6 of 234
 Brother MFC-8500 Laser Multifunction Center Users Guide - 7 of 234
 Brother MFC-8500 Laser Multifunction Center Users Guide - 8 of 234
 Brother MFC-8500 Laser Multifunction Center Users Guide - 9 of 234
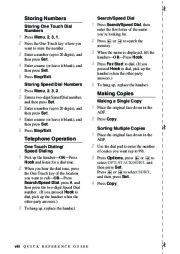 Brother MFC-8500 Laser Multifunction Center Users Guide - 10 of 234