From inside (document excerpt):
M5 Owner’s Manual for Vehicle
Congratulations, and thank you for choosing a BMW M5. Thorough familiarity with your vehicle will provide you with enhanced control and security when you drive it. We therefore have this request:
Please take the time to read this Owner’s Manual and familiarize yourself with the information that we have compiled for you before starting off in your new vehicle. It contains important data and instructions intended to assist you in gaining maximum use and satisfaction from your BMW M5’s unique range of technical features. The manual also contains information on maintenance designed to enhance operating safety and contribute to maintaining the value of your BMW M5 throughout an extended service life.
This manual is supplemented by a Service and Warranty Information Booklet for US models or a Warranty and Service Guide Booklet for Canadian models.
We wish you an enjoyable driving experience.
BMW AG
User and Operator’s Vehicle Manual. Free Auto PDF Manual Download.
Contents
The fastest way to find specific topics is to use the index, refer to page 244.
Using this Owner’s Manual
4 Notes
7 Reporting safety defects
At a glance
10 Cockpit
16 iDrive
24 Voice command system
Controls
30 Opening and closing
43 Adjusting
54 Transporting children safely
57 Driving
67 Everything under control
79 Technology for comfort, convenience and safety
93 Lamps
98 Climate
105 Practical interior accessories
Driving tips
116 Things to remember when driving 121 BMW M5 Engineering
Navigation
124 Starting navigation system
126 Destination entry
138 Destination guidance
147 What to do if …
Entertainment
150 On/off and tone
154 Radio
161 Satellite radio
164 CD player and CD changer
170 AUX-IN connection
171 USB-audio interface/mobile phone audio interface
Communications
176 Telephoning
191 BMW Assist
Mobility
202 Refueling
204 Wheels and tires
210 Under the hood
216 Maintenance
218 Care
222 Replacing components
231 Giving and receiving assistance
Reference
238 Technical data
240 Short commands of voice command system
244 Everything from A to Z
Notes
Using this Owner’s Manual
We have made every effort to ensure that you are able to find what you need in this Owner’s Manual as quickly as possible. The fastest way to find specific topics is to refer to the detailed index at the back of the manual. If you wish to gain an initial overview of your vehicle, you will find this in the first chapter.
Should you sell your BMW some day, please remember to hand over the Owner’s Manual as well; it is an important component of your vehicle.
Additional sources of information
Should you have any other questions, your BMW center will be happy to advise you. You can find information on BMW, e.g. on technology, on the Internet at www.bmwusa.com.
Symbols used
Indicates precautions that must be followed precisely in order to avoid the possibility of personal injury and serious damage to
the vehicle.<
Indicates information that will assist you in gaining the optimum benefit from your
vehicle and enable you to care more effectively
for your vehicle.<
Refers to measures that can be taken to help protect the environment.<
< Marks the end of a specific item of information.
* Indicates special equipment, country-specific equipment and optional accessories, as well as equipment and functions not yet available at the time of printing.
"..." Identifies Control Display texts used to select individual functions.
These sections contain information on using the voice activation system.
{...} Verbal instructions to use with the voice activation system.
{{...}} Identifies the answers generated by the voice activation system.
Symbols on vehicle components
Indicates that you should consult the relevant section of this Owner's Manual for information on a particular part or assembly.
The individual vehicle
When purchasing your BMW, you have decided in favor of a model with individualized equipment and features. This Owner's Manual describes all equipment and features offered for the BMW M5.
Please bear in mind that the manual may contain information on accessories and equipment that you have not specified for your own vehicle. Sections describing options and special equip
ment are marked by asterisks * to assist you in
identifying possible differences between the descriptions in this manual and your own vehicle's equipment.
If equipment in your BMW is not described in this Owner's Manual, please refer to the accompanying Supplementary Owner's Manuals.
Editorial notice
BMW pursues a policy of continuous, ongoing development that is conceived to ensure that our vehicles continue to embody the highest quality and safety standards combined with advanced, state-of-the-art technology. For this reason, it is possible that the features described in this Owner's Manual could differ from those on your vehicle.
For your own safety
Maintenance and repairs
Advanced technology, e.g. the use of modern materials and high-performance electronics, requires specially adapted maintenance and repair methods. Therefore, have corresponding work on your BMW performed only
by your BMW center or a workshop that works
according to BMW repair procedures with correspondingly trained personnel. If this work is
not carried out properly, there is a danger of
subsequent damage and related safety hazards.<
Parts and accessories
For your own safety, use genuine parts and accessories approved by BMW.
California Proposition 65 Warning
California law requires us to issue the following warning:
When you purchase accessories tested and
approved by BMW and Genuine BMW Parts,
you simultaneously acquire the assurance that
they have been thoroughly tested by BMW to
ensure optimum performance when installed
on your vehicle.
BMW warrants these parts to be free from
defects in material and workmanship.
BMW will not accept any liability for damage
resulting from installation of parts and accessories not approved by BMW.
BMW cannot test every product made by other
manufacturers to verify if it can be used on a
BMW safely and without risk to either the vehicle, its operation or its occupants.
Genuine BMW Parts, BMW Accessories and
other products approved by BMW, together
with professional advice on using these items,
are available from all BMW centers.
Installation and operation of non-BMW
approved accessories such as alarms, radios,
amplifiers, radar detectors, wheels, suspension
components, brake dust shields, telephones,
including operation of any mobile phone from
within the vehicle without using an externally
mounted antenna, or transceiver equipment
such as CBs, walkie-talkies, ham radios or the
like may cause extensive damage to the vehicle,
compromise its safety, interfere with the vehicle's electrical system, or affect the validity of
the BMW Limited Warranty. See your BMW
center for additional information.<
Maintenance, replacement, or repair of the emission control devices and systems may be performed by any automotive
repair establishment or individual using any certified automotive part.<
Engine exhaust and a wide variety of automobile components and parts, including components found in the interior furnishings in a vehicle, contain or emit chemicals known to the State of California to cause cancer and birth defects and reproductive harm. In addition, certain fluids contained in vehicles and certain products of component wear contain or emit chemicals known to the State of California to cause cancer and birth defects or other reproductive harm.
Battery posts, terminals and related accessories contain lead and lead compounds. Wash your hands after handling.
Used engine oil contains chemicals that have caused cancer in laboratory animals. Always protect your skin by washing thoroughly with soap and water.<
Service and warranty
We recommend that you read this publication thoroughly.
Your BMW is covered by the following warranties:
> New Vehicle Limited Warranty
> Rust Perforation Limited Warranty > Federal Emissions System Defect Warranty > Federal Emissions Performance Warranty > California Emission Control System Limited
Warranty
Detailed information about these warranties is listed in the Service and Warranty Information Booklet for US models or in the Warranty and Service Guide Booklet for Canadian models.
Reporting safety defects
For US customers
The following applies only to vehicles owned and operated in the US.
If you believe that your vehicle has a defect which could cause a crash or could cause injury or death, you should immediately inform the National Highway Traffic Safety Administration, NHTSA, in addition to notifying BMW of North America, LLC, P.O. Box 1227, Westwood, New America, LLC, P.O. Box 1227, Westwood, New 1117.
If NHTSA receives similar complaints, it may open an investigation, and if it finds that a safety defect exists in a group of vehicles, it may order a recall and remedy campaign. However, NHTSA cannot become involved in individual problems between you, your dealer, or BMW of North America, LLC.
To contact NHTSA, you may call the Vehicle Safety Hotline toll-free at 1-888-327-4236 (TTY: 1-800-424-9153); go to
http://www.safercar.gov; or write to: Administrator, NHTSA, 400 Seventh Street, SW., Washington, DC 20590. You can also obtain other information about motor vehicle safety from http://www.safercar.gov
For Canadian customers
Canadian customers who wish to report a safety-related defect to Transport Canada, safety-related defect to Transport Canada, 800-333-0510 toll-free from anywhere in Canada or 1-613-993-9851 from the Ottawa region and from other countries, or contact Transport Canada by mail at: Transport Canada, ASFAD, Place de Ville, Tower C, 330 Sparks Street, Ottawa, ON, K1A 0N5.
You can also obtain other information about motor vehicle safety from http://www.tc.gc.ca
At a glance
This overview of buttons, switches and displays is intended to familiarize you with your vehicle’s operating environment. The section will also assist you in becoming acquainted with the control concepts and options available for operating the various systems.
Cockpit
Around the steering wheel: controls and displays
1 Rear side window safety switch 406
2 Sun blind* for rear window 106
3 Opening and closing windows 39
4 Adjusting exterior mirrors 50
Automatic curb monitor*50
5 Folding exterior mirrors in and out*50
Turn signals 63
High beams, headlamp flasher 95
High-beam assistant*95
Parking lamps*95
Check Control 72
Computer 68
7 Shift paddles 62
8 Buttons on steering wheel
Mobile phone *176:
> Press: accepting and ending
call, starting dialing* for
selected phone number and redialing if no phone number is selected
> Press and hold: redialing
Volume Activating/deactivating voice com
mand system* 24
Changing radio station 154 Selecting music track 165
Scrolling in phone book and in lists with stored phone numbers
MDrive, call up individual
settings 52
Individually programmable 51
9 Instrument cluster 12
10
11
Windshield wipers 64
Rain sensor 64
Starting/stopping engine and switching ignition on/off 57
12 Ignition lock 57 13 Horn, entire surface
14
15
Steering wheel heater*51
Steering wheel adjustment 51
Cruise control 65 16 Releasing hood 210
17
18
19
Opening the luggage compartment lid 35
Head-Up Display*90
Parking lamps 93
Low beams 93
Daytime running lamps*94 Automatic headlamp control 93 Daytime running lamps*94 Adaptive Head Light*95 High-beam assistant*95
20
Instrument lighting 97
Instrument cluster
1 Indicator lamps for turn signals
2 Speedometer
3 Indicator and warning lamps 13
4 Tachometer 67
5 Engine oil thermometer 68
6 Display for
> Computer 68
Engine oil level 212
> Indicator and warning lamps 72 > Speed of cruise control 66 7 Display for
> Sequential Manual Transmission with Drivelogic 60
> Engine oil level for manual
transmission*212
>
Check Control message present 72 > Odometer and trip odometer 67
> Date and remaining travel distance for service requirements 70
> High-beam assistant*95
8 Fuel gauge 68
9 Resetting trip odometer 67
Indicator and warning lamps
The concept
The indicator and warning lamps can light up in different combinations and colors.
Some lamps are tested for proper function by briefly lighting up during starting of the engine or when the ignition is switched on.
Explanatory text messages
Text messages at the lower edge of the Control Display explain the meaning of the displayed indicator and warning lamps.
Additional information, e.g. on the cause and elimination of a malfunction, can be opened via the Check Control system, refer to page 72. In urgent cases, this information will be shown as soon as the corresponding lamp comes on.
Indicator lamps without text messages
The following indicator lamps signal particular functions:
Parking lamps/low beams 93
High beams/headlamp flasher 95
Handbrake applied 59
Handbrake applied for Canadian models
Lamp flashes:
DSC controls the drive and braking forces for maintaining vehicle
stability 81
MDrive 53
M Dynamic Mode 81
Exhaust-gas values 217
Exhaust-gas values for Canadian models 217
Around the center console: controls and displays
1 Microphone for hands-free mode for tele
phone*
and for voice command system *24
2 Reading lamps 97
3 SOS: initiating an emergency request 231
4 Glass sunroof*, electric 40
5 Interior lamps 97
6 Passenger airbag status lamp 89
7 Control Display 16
8 Hazard warning flashers
9 Central locking system 34
10 Automatic climate control 98
Temperature setting, left/right 99 16 Switching Entertainment sound output on/ off and adjusting volume 150
17
Heated seats 48
Active seat ventilation*49
Adjusting active backrest width*44
Flat Tire Monitor*84
PDC Park Distance Control*79
Opening luggage compartment lid*35
Automatic air distribution and volume 99
Cooling function 101
AUC Automatic recirculated-air control/recirculated-air mode 101
Maximum cooling 101
Air volume 100
Defrosting windows and removing condensation 100
Rear window defroster 100
11 Changing
> radio station 154
> track 150
12 Ejecting
> navigation DVD*124
> audio CD 164
13 Drive for navigation system DVD with Professional* navigation system 124
14 Programmable memory buttons 22
15 Drive for audio CDs 164
18 Controller 16
Can be turned, pressed, or moved in four directions
19 Opening start menu on Control Display 18 20 Drivelogic of Sequential Manual
Transmission 62
21 EDC Electronic Damper Control for Sequential Manual Transmission 83 22 DSC OFF Dynamic Stability Control for Sequential Manual Transmission 82 23 POWER M Engine Dynamic Control for Sequential Manual Transmission 59 24 EDC Electronic Damper Control for manual transmission*83
25 MDM
> M Dynamic Mode for manual
transmission 81
> Switching DSC on and off in manual transmission 82
26 Selecting AM or FM waveband
27 Selecting radio, CD and CD changer
iDrive
iDrive combines the functions of a large number of switches. This allows these functions to be operated from a central position. The following section provides an introduction to basic menu navigation. The control of the individual functions is described in connection with the relevant equipment.
Controls
1 Control Display
2 Controller with buttons
You can use the buttons to open the menus
directly. The controller can be used to
select the menu items and create settings.
> Call up a menu directly, arrow 3
> Move in four directions, arrows 4
> Turn, arrow 5
> Press, arrow 6
To avoid posing an unnecessary hazard
due to inattention, both to your own vehi
cle’s occupants and to other road users: never
attempt to use the controls or make entries
unless traffic and road conditions allow.<
Buttons on the controller Function
MENU Opens the main menu
RADIO Opens the Radio menu
CD Opens the last Entertainment menu, e.g. CD or AUX
NAV Opens the Navigation menu From the Navigation menu: opens the main menu
TEL Opens the Telephone menu BACK Opens the previous menu
Not possible from the main menu OPTION Opens the Options menu
Menu overview
Communication > Telephone* > BMW Assist* or BMW TeleServices*
Navigation or onboard information > Navigation system*
> Onboard information, e.g. for displaying the average fuel consumption
Entertainment
> Radio
> CD player and CD changer*
> AUX-IN connection
> USB-audio interface* for external audio device
Climate
> Vent settings
> Automatic programs
> Seat heater distribution*
> Parked car operation
menu
> Switching off Control Display
> Tone and display settings
> Settings for your vehicle, e.g. for MDrive, or for the central locking system
> Display of maintenance intervals and deadlines for legally mandated inspections > Settings for telephone
Operating principle
From radio readiness, refer to page 57, the following message is shown on the Control Display:
To hide the message:
Press the controller.
This displays the start menu.
The message is hidden after approx. 10 seconds.
Start menu
You can open all of the iDrive functions using five menu items.
Opening start menu
Press the
button.
Opening menu items of the start menu
In the start menu, you can open the Communication, Navigation, Entertainment and Climate menu items by moving the controller to the left, right, front or rear.
You can open the
menu by pressing the controller.
Comfort opening of menu items
Comfort opening offers you:
> Opening of a menu item of the start menu in the last display shown
> Direct changing between Communication, Navigation, Entertainment and Climate
without pressing the
button
To do so, move the controller in the corresponding direction and hold it there for longer than 2 seconds or use the buttons on the controller.
Displays in menu
1
2
Each menu is divided into fields.
The respective active field is highlighted. A symbol indicates the last selected menu item of the start menu:
Communication
Navigation or onboard information
Entertainment
Climate
menu
1 Menu items are usually grouped in horizontal or vertical lists.
2 In these lists, arrows indicate the possibility of accessing other menu items that are not currently visible.
3 Settings are displayed graphically or numerically.
Operating principle at a glance
Basic operation via iDrive is described in this You can view the individual steps under Setview. tings on Control Display, Setting time, refer to page 76.
1 Selecting menu item:
> Turn the controller; the highlight moves > Menu items shown in white can be
selected by highlighting
2 Activating menu item:
> Press the controller
> New menu items are displayed or the
function is carried out
3 Selecting menu item: refer to 1
4 Changing between fields:
> Briefly move the controller to the left, right, front or back
> Release controller
> Active field appears lighter
5 Adjusting settings:
> Turn controller
> Graphic display, numerical value or text displays can be changed
> Confirmation by changing field
Status information
1 Display for:
> Entertainment:
Radio, CD, AUX, USB-audio interface* > Telephone* in “Communication”:
Name of linked mobile phone, network search or no network
> “BMW Assist”*:
Active voice connection with a
BMW Assist service
2 Entertainment sound output off
3 Station that transmits traffic information is received*:
“TI”:
Reception of traffic information for the navigation system is possible and activated
4 Display for:
>
New entries present in “Missed calls”*
>
Roaming active
5
Telephoning* is possible if the mobile
phone is paired in the vehicle
Reception strength of mobile phone network, dependent on mobile phone 6 Time
Other displays:
The status information is temporarily hidden when there are Check Control instructions or inputs via the voice command system*.
Assistance window*
Additional information appears in the assistance window:
> The computer or trip computer
> The arrow or map view with a navigation
system*
> The current location
Selecting display
1. Move the controller to the right to change to the assistance window and press the controller.
2. Select a menu item.
3. Press the controller.
Switching assistance window off/on
1. Move the controller to the right to change to the assistance window and press the controller.
2. Select “Assist. window off” and press the controller.
To switch on, change to the assistance window and press the controller.
Switching Control Display off/on
1. Press the
button.
This opens the start menu.
2. Press the controller to open the
menu. 3. Select “Display off” and press the controller.
To switch on, press the controller.
Programmable memory buttons
You can save and request certain functions of iDrive on the programmable memory buttons: > Destinations of navigation
> Telephone, phone numbers
> Entertainment:
> radio station
> CD
> CD compartment of CD changer*
> AUX
> USB-audio interface*
The assignment of the programmable buttons is stored for the remote control currently in use.
Saving function
Destinations of navigation
1.
2.
Select navigation destination, e.g. in the destination list or the address book.
Press the
…
button longer
than 2 seconds.
Special features:
> With the destination guidance system and
the map view started, the current destination is stored.
> During destination entry via a map, the coordinates at the cursor are stored, not the current destination.
Telephone, phone numbers
1.
2.
Enter the phone number or select it in a list of the stored phone numbers, e.g. of the AZ list.
Press the
…
button longer
than 2 seconds.
If a name is assigned to the phone number, the name will also be stored.
Entertainment
In the Entertainment menu, the sound source currently heard, e.g. a radio station, is stored, regardless of the selection on the Control Display.
1.
2.
Select the desired function, e.g. radio station or CD.
Press the
…
button longer
than 2 seconds.
If the vehicle is equipped with two drives, the current track is stored for CDs with
5. Select “Programmable Memory Keys” and press the controller.
compressed audio files.<
Running function
Press the
...
button.
When selecting a phone number, the connection is also established, or the destination guidance is started when a navigation destination is selected.
Displaying button assignment
You can display the assignment of the buttons by touching them with your finger. Please do not wear gloves when doing so. Touching with an object, e.g. a pen, does not function.
Displaying short info
Touch the
...
button.
The assignment of the buttons is displayed.
Destination of navigation system
Entertainment source
Telephone, phone number
Not assigned
Displaying detailed information
Touch the
...
button longer.
Deleting button assignments
1. Press the
button.
This opens the start menu.
2. Press the controller to open the
menu.
3. Select "Settings" and press the controller.
4. Select "Vehicle / Tires" and press the controller.
6.
7.
Select "Delete assignment of all memory keys" and press the controller.
Confirm with "Yes".
Voice command system*
The concept
The voice command system allows you to control operation of various vehicle systems without taking your hands off the steering wheel. Individual menu items on the Control Display can be spoken as commands. This frees you of having to use the controller.
The voice command system transforms your oral commands into control signals for the selected systems and provides support in the form of instructions or questions.
The voice command system uses a special microphone located in the area of the interior rearview mirror, refer to page 14.
Precondition
Via iDrive, set the language that applies for the voice command system in order to enable identification of the spoken commands. To set the language of iDrive, refer to page 78.
Symbols in Owner's Manual
{ ...} Say the specified commands word for word.
{{...}} Indicates responses of the voice command system.
Voice commands
Activating voice command system
1. Press the
button.
This symbol on the Control Display and an acoustic signal tell you that the voice command system can respond to commands.
2. Say the command.
The command is displayed on the Control Display.
This symbol is shown on the Control Display when you can input additional commands. If no other commands are possible, then operate the equipment via iDrive.
Terminating or canceling voice command system
Press the
button on the steering wheel or
{Cancel}
Commands
Having possible commands read aloud
You can have the system read aloud the possible commands related to the selected menu item on the Control Display.
To have the system list the possible commands:
{Options}
For instance, if you have selected "CD", the commands available for operating the CD player and CD changer* are read out.
Opening help
{Help}
Using alternative commands
There are often a number of commands to run a function, e.g.:
{Radio on} or {Turn radio on}
Running functions directly with short commands
With short commands you can run certain functions directly, regardless of which menu item is selected, refer to page 240.
Opening start menu
{Main menu}
Example: selecting a track
1. Switch on Entertainment sound output if necessary.
2. Press the
button on the steering wheel.
3. {Entertainment}
The system says:
{{Entertainment}}
4. {CD}
The system says:
{{CD on}}
5. Press the
button on the steering wheel.
6. Select track, e.g.:
{Track 1}
The system says:
{{Track 1}}
Notes
The mobile phone can also be operated with voice commands, refer to
page 187.<
For voice commands, bear the following in
mind:
Say the commands and numbers smoothly >
and at normal volume, avoiding excessive emphasis and pauses. This also applies to spelling when entering the destination.
> Always issue commands in the language of the voice command system.
> When selecting a radio station, use the common pronunciation of the station name.
> For entries in the voice-activated phone book, only use names in the language of the voice command system and do not use abbreviations.
> Keep the doors, windows and glass sun
roof* closed to prevent interference from
ambient noise.
Controls
This chapter is intended to provide you with information for complete control of your vehicle. Its extensive array of features and accessories,
both for driving and for your own safety, comfort and convenience, are described here.
Opening and closing
Keys/remote control
1 Remote control with integrated key
2 Spare key
3 Adapter for spare key, in glove compartment
Remote control with integrated key
Each remote control contains a battery which is charged in the ignition lock while driving. Drive a longer distance with each remote control at least twice a year to keep the battery charged. In cars with convenient access*, the remote control contains a replaceable battery, refer to page 39.
Depending on which remote control is detected by the vehicle during unlocking, different settings are activated and executed in the vehicle, refer to Personal Profile, page 31.
Information on the required for maintenance is also stored in the remote control, refer to Service data in remote control, page 216.
Integrated key
Press button 1 to unlock the key.
The integrated key fits the following locks: > Glove compartment, refer to page 107 > Driver’s door, refer to page 34
New remote controls
To obtain additional or replace lost keys, new remote controls with an integrated key are available at your BMW center.
Spare key
Store the spare key in a safe place such as your wallet. This key is not intended for regular use. The spare key and integrated key fit the same locks.
Adapter for spare key
The adapter is required so that the vehicle can be started with the spare key or radio readiness can be switched on.
Remove the adapter from the holder in the glove compartment and slide the spare key into the adapter before use.
Personal Profile
The concept
You can set a number of functions of your BMW individually according to your preferences. Personal Profile ensures that most of these settings are stored for the remote control currently in use without you having to do anything. When the vehicle is unlocked, the corresponding remote control is detected and the settings stored for it are called up and carried out. This means that you will always find your BMW set to your own personal settings even if another person with his/her own remote control and settings has used the vehicle since the last time you drove it. The individual settings are stored for a maximum of four remote controls, for two with comfort access*.
Personal Profile settings
Details on the settings are provided on the specified pages.
> Behavior of the central locking system
when unlocking vehicle, refer to page 32 > Automatic locking of the vehicle, refer to
page 34
> Programming button on steering wheel,
refer to page 51
> Displays on Control Display:
> Brightness of the Control Display, refer to page 77
> Measuring units for consumption, route/ distances, temperature, and pressure, refer to page 77
> 12h/24h clock format, refer to page 76
> Date format, refer to page 77
> Language on Control Display, refer to page 78
> Lighting settings:
> Triple turn signal activation, refer to page 63
> Welcome lamps, refer to page 93
> Pathway lighting, refer to page 94
> Daytime running lamps*, refer to page 94
> High-beam assistant*, refer to page 95 > Individual settings for MDrive, refer to
page 52
> Drivelogic driving program in the Sequential
mode, refer to page 62
> PDC Park Distance Control*: optical warning, refer to page 79
> Head-Up Display*: selection and brightness of display, refer to page 90
> Automatic climate control: AUTO program
and intensity, cooling function, and automatic recirculated air control/recirculated
air mode, temperature, air distribution, temperature in the upper body region, refer to
text starting on page 99
> Navigation system*: voice instructions for
destination guidance, refer to page 141 In addition, the following, most recently selected settings are recalled during unlocking: > Programmable memory buttons: selecting
stored functions, refer to page 22
> Positions of driver’s seat, outside mirrors,
and steering wheel*, refer to page 45 > Audio sources: volume and tone settings,
refer to page 151
> Radio:
> Display of stored stations, refer to page 154
> Switching RDS Radio Data System on/ off*, refer to page 157
> Phone: volume setting, refer to page 182 the inside. Always take along the remote control when leaving the vehicle so that the vehicle can then be opened from the outside.<
Unlocking
Press the
button.
The interior lamps, the courtesy lamps*, and the welcome lamps are switched on.
Central locking system
The concept
The central locking system functions when the driver's door is closed.
The system simultaneously engages and releases the locks on the following:
> Doors
> Luggage compartment lid
> Fuel filler door
Operating from outside
> via the remote control
> Using door lock
> with comfort access* via the door handles
In addition, it the remote control is used, the welcome lamps, the interior lamps and the courtesy lamps are switched on or off. The alarm system is armed/disarmed at the same time.
You can find more detailed information on the alarm system on page 37.
Operating from inside
Via the button for central locking, refer to page 34. The fuel filler door is not locked.
In the event of a sufficiently severe accident, the central locking system unlocks automatically. In addition, the hazard warning flashers and interior lamps come on.
Opening and closing: Using remote control
Persons or animals left unattended in a parked vehicle can lock the doors from
Setting unlocking behavior
You can set whether the first press of the button unlocks only the driver’s door or the entire vehicle.
iDrive, for operating principle refer to page 16.
1. Press the
button.
This opens the start menu.
2. Press the controller to open the
menu.
3. Select “Settings” and press the controller.
4. Select “Vehicle / Tires” and press the controller.
5. Change to upper field if necessary. Turn the controller until “Door locks” is selected and press the controller.
6. Select “Central locking” and press the controller.
7. Select “Unlock button” and press the controller.
8. Select a menu item:
> “All doors”
Pressing the
button once unlocks the
entire vehicle.
> “Driver’s door only”
Pressing the
button once unlocks the
driver’s door and the fuel filler door. Pressing the button twice unlocks the entire vehicle.
9. Press the controller.
The setting is stored for the remote control currently in use.
Comfort opening
Press and hold the
button. The windows and
the glass sunroof* open.
Locking
Press the
button.
Do not lock the vehicle from the outside if persons are inside, as unlocking from the inside is not possible without special knowledge.< Switching on interior lamps With vehicle locked: Press the button. You can also use this function to locate your vehicle in parking garages etc. Panic mode* You can trigger the alarm system in case of danger: Press the button for at least 3 seconds. Switching off alarm: press any button. Opening luggage compartment lid Press the button for approx. 1 second. The luggage compartment lid opens, regardless of whether it was previously locked or unlocked. During opening, the luggage compartment lid pivots back and up. Make sure that adequate clearance is available before opening. To prevent accidentally locking yourself out, never lay the remote control in the cargo bay. A previously locked luggage compartment lid is also locked again after closing.< Confirmation signals You can activate or deactivate the confirmation signals. 1. 2. 3. 4. 5. 6. Open the start menu. Press the controller to open the menu. Select "Settings" and press the controller. Select "Vehicle / Tires" and press the controller. Change to upper field if necessary. Turn the controller until "Door locks" is selected and press the controller. Select "Confirmation" and press the controller. 7. 8. Select the desired signal. Press the controller. The signal is activated. Malfunction The remote control may malfunction due to local radio waves. Should the remote control fail to operate due to interference of this kind, unlock and lock the vehicle via the door lock using a key. If it is no longer possible to lock the vehicle using the remote control, then the battery is discharged. Use this remote control during an extended drive; this will recharge the battery, refer to page 30. For US owners only The transmitter and receiver units comply with part 15 of the FCC/Federal Communication Commission regulations. Operation is governed by the following: FCC ID: LX8766S LX8766E LX8CAS LX8CAS2 Compliance statement: This device complies with part 15 of the FCC Rules. Operation is subject to the following two conditions: > This device must not cause harmful interference, and
> this device must accept any interference received, including interference that may cause undesired operation.
Any unauthorized modifications or changes to these devices could void the
When unlocking
1. Turning the key once unlocks the driver’s door and the fuel filler door.
2. Turning the key a second time unlocks the remaining doors and the luggage compartment lid.
Convenient operation
You also have the option of operating the win
dows and the glass sunroof* from the driver’s
door lock.
Turn and hold the key in the positions for unlocking or locking.
Watch during the closing process to be sure that no one is injured. Releasing the key stops the operation.<
Manual operation
In the event of an electrical malfunction, you can turn a key all the way to the right or left in the door lock to lock or unlock the driver's door.
user's authority to operate this equipment.<
Opening and closing: Using door lock
Do not lock the vehicle from the outside if persons are inside, as unlocking from the inside is not possible without special knowledge.<
Opening and closing: from inside
When the front doors are closed, this button unlocks or locks the doors and luggage compartment lid, but does not activate the anti-theft system. The fuel filler door remains unlocked.
Automatic locking
iDrive, for operating principle refer to page 16. 1. Press the
button.
This opens the start menu.
2. Press the controller to open the
menu.
3. Select "Settings" and press the controller.
4. Select "Vehicle / Tires" and press the controller.
5. Change to upper field if necessary. Turn the controller until "Door locks" is selected and press the controller.
6. Select "Central locking" and press the controller.
7. Select a menu item:
> “Relock door if not opened”
The central locking system locks again after a short time if no door has been opened.
> “Lock after driving”
The central locking system locks the vehicle as soon as you start to drive.
8. Press the controller.
The setting is selected.
The setting is stored for the remote control currently in use.
Unlocking and opening
> Either unlock the doors together with the button for the central locking system and then pull the door handle above the armrest or
> pull on the door handle of each door twice: the first time unlocks the door, the second time opens it.
Locking
> Use the central locking button to lock all of the doors simultaneously, or
> press down the lock button of a door. To prevent you from being locked out, the open driver’s door cannot be locked using the lock button.
Persons or animals left unattended in a parked vehicle can lock the doors from the inside. Always take along the remote control when leaving the vehicle so that the vehicle can then be opened from the outside.< Doors Automatic soft closing* To close the doors, merely push them gently. The closing process will then be carried out automatically. Make sure that the closing path of the doors is clear; otherwise injuries may result.< Luggage compartment lid During opening, the luggage compartment lid pivots back and up. Make sure that adequate clearance is available before opening.< Opening from inside Press button 1 or button 2*: the luggage compartment lid opens. Opening from outside Press the button on the luggage compartment lid or the button on the remote control for approx. 1 second: the luggage compartment lid opens. Closing Make sure that the closing path of the luggage compartment lid is clear, otherwise injuries may result.< The handle recesses on the interior trim of the luggage compartment lid make it easier to pull down. Emergency release Pull the lever in the cargo bay. The luggage compartment lid is unlocked. Manual release If an electrical malfunction should occur, you can unlock the luggage compartment lid manually. 1. Grasp the rear seat 1 at the front edge and remove from the mounts 2. Take out the rear seat. 2. Pull the ring. The luggage compartment lid is unlocked and opens. Only grasp the emergency release by the ring, otherwise injuries can occur.< Reinstalling rear seat: 1. Position the rear seat in the vehicle. Guide the two outer belt buckles 3 through the seat bench and slide the seat bench completely under the backrest. The center belt buckle 4 must be guided between the seat bench and the backrest when doing so. Do not twist the center belt buckle, otherwise correct operation of this safety equipment is not ensured.< 2. Press the rear seat downward into the mounts at the front until it audibly engages. Alarm system The concept The vehicle alarm system responds: > When a door, the hood, or the luggage compartment lid are opened
> To movements in the vehicle: interior motion sensor, refer to page 37
> To changes in the vehicle’s tilt if someone attempts to steal the wheels or tow the vehicle
> To interruptions in battery voltage
Unauthorized operations are briefly signaled by
the alarm system:
> with an acoustic alarm
> by switching on the hazard warning flashers
> by flashing the high beams
Arming and disarming alarm system
When you lock or unlock the vehicle, either with the remote control or at the door lock, the alarm system is armed or disarmed at the same time.
The luggage compartment lid can also be opened with the system armed using the
button on the remote control, refer to page 35. When the luggage compartment lid is closed, it is locked and monitored again.
Switching off alarm
> Unlock the vehicle using the remote control, refer to page 32.
> Insert the remote control all the way into the ignition lock.
Indicator lamp displays
> The indicator lamp under the interior rearview mirror flashes continuously: the system is armed.
> The indicator lamp flashes after locking: doors, hood or luggage compartment lid are not properly closed. Even if you do not close the alerted area, the system begins to monitor the remaining areas, and the indicator lamp flashes continuously after approx. 10 seconds. However, the interior motion sensor is not activated.
> The indicator lamp goes out after unlocking: your vehicle has not been disturbed while you were away.
> The indicator lamp flashes after unlocking until the remote control is inserted into the ignition lock, however for a maximum of approx. 5 minutes: your vehicle has been disturbed while you were away.
Tilt alarm sensor
The tilt of the vehicle is monitored. The alarm system reacts, e.g. in case of an attempted wheel theft or towing.
Interior motion sensor
In order for the interior motion sensor to func
tion properly, the windows and glass sunroof*
must be completely closed.
Avoiding unintentional alarms
The tilt alarm sensor and interior motion sensor may be switched off at the same time. This prevents unintentional alarms, e.g. in the following situations:
> In two-level garages
> When transporting on car-carrying trains,
by sea or on a trailer
> When animals are to remain in the vehicle
Switching off tilt alarm sensor and interior motion sensor
Press the
button on the remote control
again as soon as the vehicle is locked. The indicator lamp lights up briefly and then flashes continuously. The tilt alarm sensor and the interior motion sensor are switched off until the next time the vehicle is unlocked and subsequently locked again.
Comparison with ordinary remote control
You can control the functions mentioned previously with the comfort access or by pressing the buttons on the remote control. Therefore, please familiarize yourself with the information on opening and closing beginning on page 30 beforehand.
The special features when using comfort access are described in the following.
Should a short delay occur when opening or closing the windows or the glass sunroof, the system is checking whether a remote control is located in the vehicle. Please repeat opening or closing if necessary.<
Comfort access*
Comfort access allows you to access your vehicle without having to hold the remote control in your hand. It is sufficient to carry the remote control with you, e.g. in your jacket pocket. The vehicle automatically detects the associated remote control in the immediate vicinity or in the interior.
Comfort access supports the following functions:
> Unlocking/locking vehicle
> Comfort closing
> Opening luggage compartment lid separately
> Starting engine
Functional requirement
> The vehicle or the luggage compartment lid can only be locked if the vehicle detects that the remote control you are carrying is outside the vehicle.
> The next unlocking and locking cycle is not possible until after approx. 2 seconds.
> The engine can only be started if the vehicle detects that the remote control is located in the vehicle.
Unlocking
Grasp a door handle fully, refer to arrow 1, but do not touch the surfaces, arrow 2 or 3 when doing so. This corresponds to pressing the
button.
Locking
> On the driver’s door, touch the highlighted surface, arrow 2, with a finger for approx. 1 second, but do not grasp the door handle.
> On the remaining doors, touch the highlighted surface, arrow 3, with the back of your hand for approx. 1 second, but do not grasp the door handle.
This corresponds to pressing the
but
ton.
Please make sure that the ignition and all electronic systems/consumers are
switched off before locking to save the battery.<
Comfort closing
Hold a finger or the back of your hand against the surface, arrow 2 or 3, but do not grasp the door handle while doing so.
The windows and the glass sunroof* are
closed.
Watch during the closing process to be sure that no one is injured. Removing the
hand from the door handle stops the closing process immediately.<
Opening luggage compartment lid separately
Press the button on the luggage compartment lid. This corresponds to pressing the
button.
If the vehicle detects that a remote control has been accidentally left inside the locked vehicle's cargo bay after the luggage
compartment lid is closed, the lid will reopen.
The hazard warning flashers flash and a signal*
sounds.<
Switching on radio readiness
By pressing the Start/Stop button, you switch on the radio readiness, refer to page 57.
When doing so, do not depress the brake
or clutch pedal, otherwise the engine will start immediately.<
vehicle with the buttons on the remote control or with a key. To start the engine following this, insert the remote control in the ignition lock. When unlocking or locking/comfort closing do not simultaneously grasp the door handle and touch the surfaces, arrow 2 or 3. Otherwise, you may limit the function.
Replacing battery
If the battery of the remote control is dead, a message will appear in the Control Display. 1. Remove integrated key from remote control, refer to page 30.
2. Remove cover.
3. Lay in new battery with positive side facing upward.
4. Press cover closed.
Return used battery to a recycling collection point or to your BMW center.<
Starting engine
You can start the engine or switch on the ignition if a remote control is located in the interior of the vehicle. It is not necessary to insert a remote control into the ignition lock, refer to page 57.
If you take the remote control with you when leaving the vehicle with the engine running, a warning lamp lights up. In addition, a message appears on the Control Display. As long as no remote control is detected, it is only possible to restart the engine within approx. 10 seconds after it is switched off.
Malfunction
The comfort access function may malfunction due to local radio waves. Then open or close the
Windows
To prevent injuries, exercise care when closing the windows and keep them in your field of vision until they are shut.
Always take along the remote control when you
leave the vehicle, otherwise children could, for
example, operate the windows and injure themselves.<
Opening, closing
> Press switch to resistance point:
The window continues to open as long as you keep the switch pressed.
> Press switch beyond resistance point: The window opens automatically. Pressing the switch again stops the opening movement.
You can close the windows in the same manner by pulling the switch.
Separate switches for the rear windows are located in the rear.
For information on convenient operation via the remote control or door lock, refer to page 33 or 34.
For information on comfort closing with comfort access, refer to page 39.
After switching off ignition
You can still operate the windows with the remote control removed or the ignition
switched off for approx. 1 minute, as long as neither of the front doors has been opened.
Pinch protection system
If the closing force exceeds a specific value as a window closes, the closing action is interrupted and the window reopens slightly.
Despite the pinch protection system, inspect the window’s travel path prior to closing it, as the safety system might fail to
detect certain kinds of obstructions, such as
thin objects, and the window would continue
closing.
Do not install any accessories in the range of
movement of the windows, otherwise the pinch
protection system will be impaired.<
Closing without pinch protection system
In case of danger from outside or if, for example, ice on the window prevents normal closing, proceed as follows:
1.
2.
Pull the switch beyond the resistance point and hold. The pinch protection system is limited and the window opens slightly if the closing force exceeds a certain value. Pull the switch beyond the resistance point and hold again within approx. 4 seconds. The window closes without the pinch protection system.
Safety switch
With the safety switch, you can prevent the rear windows from being opened or closed via the switches in the rear passenger area, by children, for example. The LED lights up when this safety feature is activated.
Always press the safety switch when children ride in the rear, otherwise uncontrolled closing of the windows could lead to
injuries.<
Electric glass sunroof*
The glass sunroof is ready for operation when the ignition is switched on, refer to page 57.
To prevent injuries, exercise care when
closing the glass sunroof and keep it in your field of vision until it is closed.
Always take along the remote control when you leave the vehicle, otherwise children could, for example, operate the roof and injure themselves.<
Raising
Press the switch.
The closed glass sunroof is raised and the sliding visor opens slightly.
Do not use force to close the sliding visor with the glass sunroof in its raised position, otherwise the mechanism will be damaged.<
> Press the switch with the sunroof open: the sunroof is raised all the way.
> When the sunroof is raised, briefly press the switch in the opening direction: The sunroof is opened all the way.
Briefly pressing the switch stops the motion.
Pinch protection system
If the glass sunroof encounters resistance when closing from roughly the center of the roof opening or when closing from the raised position, the closing action is interrupted and the glass sunroof reopens a short way.
Despite the pinch protection system, inspect the sunroof’s travel path prior to closing it, as the safety system might fail to
detect certain kinds of obstructions, such as
very thin objects, and the sunroof would continue closing.<
Opening, closing
> Slide the switch back to the resistance point.
The glass sunroof and the sliding visor open together for as long as you hold the switch in this position.
> Briefly press the switch back beyond the resistance point.
The glass sunroof and the sliding visor open automatically. Briefly pressing the switch stops the motion.
In a similar manner, the glass sunroof closes when you slide the switch forward. The sliding visor remains open and can be closed by hand. For information on convenient operation via the remote control or door lock, refer to page 33 or 34.
For information on comfort closing with comfort access, refer to page 39.
Opening and closing automatically
Briefly press the switch beyond the resistance point.
The following movements are also automatic:
Closing without pinch protection system
In case of danger from outside, slide the switch forward beyond the resistance point and hold. The roof closes without the pinch protection system.
Following interruptions in electrical power supply
After a power loss, the sunroof may only respond to the raise command. Then have the system initialized. BMW recommends having this work done by your BMW center.
Moving manually*
In the event of an electrical malfunction, you can move the glass sunroof manually.
1. Fold the cover panel down, if necessary using a screwdriver from the onboard tool kit, refer to page 222.
2. Insert the Allen wrench* into the opening provided. Move the glass sunroof in the desired direction. The arrow below indicates the rotation direction for closing.
Adjusting
Sitting safely
The ideal sitting position can make a vital contribution to relaxed, fatigue-free driving. In the interaction with the safety belts, the head restraints and the airbags, the sitting position plays an important role in an accident. To ensure that the safety systems operate with optimal efficiency, we strongly urge you to observe the instructions contained in the following section.
For additional information on transporting children safely, refer to page 54.
Head restraints
A correctly adjusted head restraint reduces the risk of spinal injury in the event of an accident.
Adjust the head restraint so that its center is approx. at ear level. Otherwise there is increased danger of injury in the event of an
accident.<
Head restraints, refer to page 46.
Airbags
Always maintain an adequate distance between yourself and the airbags. Always hold the steering wheel by its rim with hands at
the 9 o'clock and 3 o'clock positions, to minimize the risk of injuries to your hands and arms
in the event of airbag deployment.
No one and nothing is to come between the airbags and the seat occupant.
Do not use the cover of the front airbag on the
front passenger side as a storage area. Make
sure that the front passenger is sitting correctly
and does not rest feet or legs on the instrument
panel, otherwise leg injuries can occur if the
front airbags are triggered.
Make sure that occupants do not rest their head
on the side or head airbags, otherwise injuries
can occur if the airbags are triggered.<
Even if you adhere to all the instructions, injuries resulting from contact with airbags cannot
be fully excluded, depending on the circumstances. The ignition and inflation noise may
provoke a mild hearing loss in extremely sensitive individuals. This effect is usually only temporary.
For airbag locations and additional information
on airbags, refer to page 88.
Safety belts
Before every drive, make sure that safety belts are being worn at all of the occupied seats. Airbags complement the safety belt as an additional safety device, but they do not represent a substitute.
Your vehicle is provided with five seats, which are all equipped with a safety belt.
Never allow more than one person to wear a single safety belt. Never allow infants or small children to ride in a passenger's
lap. Make sure that the belt lies low around the
hips in the lap area and does not press on the
abdomen. The safety belt must not lie across
the neck, rub against sharp edges, be routed
over solid or breakable objects or be pinched.
Wear the safety belt without twisting, snugly
across the lap and shoulders, as close to the
body as possible. Otherwise the belt can slip
over the hips in the lap area in a frontal impact
and injure the abdomen. Avoid wearing clothing
that prevents the belt from fitting properly and
pull the belt in the upper body area periodically
to readjust the tension, in order to avoid a
reduction in the restraint of the safety belt.<
Safety belts, refer to page 47.
Seats
Note before adjusting
Never attempt to adjust your seat while the vehicle is moving. The seat could respond with unexpected movement, and the
ensuing loss of vehicle control could lead to an accident.
Also on the passenger side, do not incline the backrest too far to the rear while the vehicle is being driven, otherwise there is a danger in the event of an accident of sliding under the safety belt, eliminating the protection normally provided by the belt.<
Please follow the instructions on damage to safety belts provided on page 48 and the information on the active front head restraints on page 46.
Adjusting seat
To ensure that the safety systems continue to provide optimized protection, please observe the adjustment instructions on
page 43.<
1 Longitudinal direction
2 Height
3 Angle
4 Backrest width
5 Backrest
6 Head restraint height
7 Shoulder support*
8 Thigh support
9 Lumbar support*
Shoulder support*
This also supports the back in the shoulder area, This provides a relaxed driving position and helps relieve stress on the shoulder muscles.
Lumbar support*
You can also adjust the contour of the backrest to obtain additional support in the lumbar region.
The upper hips and spinal column receive supplementary support to help you maintain a relaxed, upright sitting position.
> Increase or decrease curvature: press front
or rear section of switch.
> Shift curvature up or down: press upper or
lowers section of switch.
Adjusting active backrest width*
First set a comfortable backrest width, see above. Based on the backrest width set, the lateral support is automatically adapted to the current driving situation.
The adaptation of the backrest width and the speed of the adjustment vary depending on the program. You can select from among three programs from comfort to sport. The “Sport” program provides increased lateral support on both sides when driving through a quick succession of curves.
Press the button repeatedly until the desired program is shown on the Control Display. The LED in the button lights up.
To deactivate: Press button longer.
You can also activate your preferred program for the active backrest width adjustment of the
driver’s seat with the
button on the steering wheel, refer to MDrive on page 52.
Easy entry/exit*
To facilitate entry and exit, the backrest width temporarily opens all the way.
Seat, mirror and steering wheel memory
You can store and request two different positions for the driver’s seat and passenger seat*, exterior rearview mirrors, and steering wheel. The adjustment of the lumbar support is not stored in the memory.
Storing
1.
2.
3.
4.
Switch on radio readiness or ignition, refer to page 57.
Set the desired seat, exterior mirror and steering wheel positions.
Press the
button:
The LED in the button lights up.
Press the desired memory button 1 or 2: The LED goes out.
Requesting
Do not request a position from the memory while the vehicle is moving. There is a risk of accident from unexpected movement of the seat or steering wheel.<
Comfort mode
1. Open the driver's door after unlocking or switch on radio readiness.
2. Briefly press the desired memory button 1 or 2.
The system cancels the adjustment procedure when you briefly press one of the seat adjustment switches or one of the memory buttons.
Safety feature
1. Close the driver's door and switch the ignition on or off.
2. Press the desired memory button 1 or 2 and maintain pressure until the adjustment process has been completed.
If the
button was pressed inadvertently: press the button again; the LED goes out.
Requesting with remote control
The last positions of the driver's seat, the exterior rearview mirrors, and steering wheel are stored for the remote control currently in use. You can choose when the position is requested: > Request when unlocking vehicle
> Request when opening driver’s door
When using this feature, always make sure that the footwell behind the driver’s seat is empty and unobstructed. Failure to do
so could cause injury to persons or damage to
objects behind the seat as a result of a rearward
movement of the seat.<
The system cancels the adjustment procedure
when you briefly press one of the seat adjustment switches or one of the memory buttons.
iDrive, for operating principle refer to page 16.
1. Open the start menu.
2. Press the controller to open the
menu.
3. Select "Settings" and press the controller.
4. Select "Vehicle / Tires" and press the controller.
5. Change to upper field if necessary. Turn the controller until "Door locks" is selected and press the controller.
6.
7.
8.
Select "Central locking" and press the controller.
Select "Last seat pos." and press the controller.
Select "After unlocking" or "After door opened".
9. Press the controller.
To cancel the request:
Select "Deactivated" and press the controller.
Head restraints
A correctly adjusted head restraint reduces the risk of spinal injury in the event of an accident.
Adjust the head restraint so that its center is approximately at ear level. Otherwise
there is increased danger of injury in the event of an accident. Only remove the head restraints if no one will be sitting on the seat in question. Reinstall the head restraints before transporting passengers, as otherwise the head restraint cannot provide its protective function.<
Active front head restraints
In the event of a rear-end collision of sufficient severity, the active head restraint reduces the distance to the head.
Do not use seat covers or head restraint covers that could impede the proper functioning of the active head restraint. Otherwise, there is no assurance that the active head
restraint will perform its protective function and
it is not possible to take advantage of its injuryreducing potential in the event of a rear-end
collision.
Have the active head restraints reset after they are triggered in a rear-end collision. Only have this work carried out by a BMW center or a workshop that works according to BMW repair procedures with correspondingly trained personnel. Otherwise, this safety equipment will
not function properly.<
Please contact a BMW center if you wish to have the front head restraints removed
and installed.<
Front seats: height adjustment
Front seats: adjusting distance to the back of the head
> Forward: pull up.
> Back: push the button and slide the headrest cushion toward the rear.
Do not place any objects behind the headrest cushion. Otherwise, you can
impair the proper function of the head restraint.<
On seats with a shoulder support* you adjust the distance to the back of the head with the shoulder support, refer to page 44.
Adjusting side extensions*
You can fold the side extensions on the head restraint forward for increased lateral support in the resting position.
Rear seats: height adjustment
> To raise: pull up.
> To lower: press the button, arrow 1, and push the head restraint downward.
Removing
1. Pull the head restraint upward to the stop.
2. Press the button, arrow 1, and pull the head restraint all the way out.
Safety belts
To ensure that the safety systems continue to provide optimized protection, please observe the adjustment instructions on
page 43.<
Before every drive, make sure that safety belts
are being worn at all of the occupied seats. Airbags complement the safety belt as an additional safety device, but they do not represent a substitute.
Fastening
Make sure you hear the latch plate engage in the belt buckle.
Safety belt reminder for driver's seat and passenger seat*
The indicator lamp lights up and a signal sounds. A message also appears on the Control Display. Please check
whether the safety belt is correctly positioned. The safety belt reminder is operative at speeds above approx. 5 mph/8 km/h. It can also be activated if objects are placed on the passenger seat.
Releasing
1. Grasp the belt firmly.
2. Press the red button in the buckle.
3. Guide the belt into its reel.
The shoulder strap's anchorage point will be correct for adult seat occupants of every build if the seat is correctly adjusted, refer to page 43. The two rear safety belt buckles integrated into the rear seat are for passengers sitting on the left and right. The belt buckle embossed with the word CENTER is intended exclusively for use by passengers riding in the center position.
Damage to safety belts
When subjected to strain due to an accident or in the event of damage, replace the safety belts, the belt tensioners, and any
child restraint systems and have the belt anchor
points checked. Only have this work carried out
at a BMW center or at a workshop that works
according to BMW repair procedures with correspondingly trained personnel. Otherwise correct operation of this safety equipment is not
guaranteed.<
Seat heating
Front
The appearance and arrangement of the buttons may vary depending on the equipment.
1
2
3
Seat heating, three LEDs
Seat heating, one LED
Seat heating with active seat ventilation*
Press the respective button once per temperature level. The temperature level is shown on the Control Display with buttons 2 and 3. The maximum temperature is supplied when three LEDs are lit.
The temperature is reduced and if need be, the heating is switched off in order to reduce the load on the battery. The LEDs remain lit. To switch off: Press button longer.
Temperature distribution without active seat ventilation
The heat output can be distributed variously in the seat cushion and the backrest.
iDrive, for operating principle refer to page 16. 1. Open the start menu.
2. Move the controller to the left to open "Climate".
3. Select "Seat heater distribution" and press the controller.
4. Move the controller to the left or right to select "Driver" or "Passenger".
5. Turn the controller to adjust the distribution.
The setting is applied.
Temperature distribution with active seat ventilation
The heat output can be distributed variously in the seat cushion and the backrest.
iDrive, for operating principle refer to page 16. 1. Open the start menu.
2. Move the controller to the left to open "Climate".
3. Select "Driver's seat climate" or "Passenger's seat climate" and press the controller.
Turn the controller to adjust the distribution. The setting is applied.
Rear
Operation similar to front seat heating; two temperature levels, without temperature distribution.
Active seat ventilation*
The appearance and arrangement of the buttons may vary depending on the equipment.
1 Active seat ventilation
2 Active seat ventilation with seat heating Press the respective button once per ventilation level. The ventilation level appears on the Control Display. The maximum level is supplied when three LEDs are lit.
The air quantity is reduced and if need be, the ventilation is switched off in order to reduce the load on the battery. The LEDs remain lit. To switch off: Press button longer.
up. < The highest level is used for rapid cooling, e.g. when the vehicle has become heated
Folding mirrors in and out*
Pressing button 3 allows you to fold mirrors in and out up to a speed of approx. 20 mph/ 30 km/h. This is advantageous, for example, in car washes, narrow streets or for bringing mirrors that have been manually folded in back into the correct position. Mirrors that were folded in are folded out automatically at a speed of approx. 25 mph/40 km/h.
Before going through a car wash, fold the mirrors in manually, or with button 3, otherwise they could be damaged, depending on the width of the car wash system.<
Mirrors
Exterior mirrors
Objects reflected in the mirror are closer than they appear. Do not estimate the distance of following traffic based on what you see in the mirrors, otherwise there is an increased accident risk.<
1 Adjusting
2 Switching to the other mirror or to the automatic curb monitor
3 Folding mirrors in and out*
Storing the mirror positions, refer to Seat, mirror and steering wheel memory on page 45.
Adjusting manually
You can also adjust the mirrors manually by pressing against the outer edges of their mirror glass.
The mirror on the passenger's side is more curved than the driver's mirror.
Automatic heating
Below a certain outdoor temperature, both exterior mirrors are heated whenever the engine is running or the ignition is switched on.
Tilting down passenger-side exterior mirror – automatic curb monitor
Activating
1. Slide switch into the driver's side mirror position, arrow 1.
2. Shift into reverse or move selector lever into
position R.
The mirror glass tilts downward somewhat on the passenger's side. This allows the driver to see the area immediately adjacent to the vehicle – such as a curb – when parking, etc.
Deactivating
Slide switch into the passenger side mirror position, arrow 2.
Interior rearview mirror
To reduce the dazzle effect of following vehicles at night, turn the knob.
Interior and exterior mirrors, automatic dimming feature*
This feature is controlled by two photocells in the inside rearview mirror, one on the front and one on the back.
For trouble-free operation, keep the photocells clean and do not cover the area between the interior rearview mirror and the windshield. Do not attach stickers of any kind to the windshield in front of the mirror, either.
Steering wheel
Adjusting
Do not adjust the steering wheel while the vehicle is moving. There is a risk of accident as the result of unexpected movement.<
The steering wheel can be adjusted in four directions.
Storing steering wheel positions, refer to Seat, mirror and steering wheel memory on page 45.
Easy entry/exit*
To facilitate entry and exit, the steering wheel temporarily moves into the uppermost position.
Steering wheel heating*
Press the button.
When the steering wheel heater is operating, the LED in the button lights up.
Programmable button on steering wheel
You can program the button individually. The setting is stored for the remote control currently in use.
iDrive, for operating principle refer to page 16.
1. Press the
button.
This opens the start menu.
2. Press the controller to open the
menu.
3. Select "Settings" and press the controller.
4. Select "Steering wheel button" and press the controller.
A list of various functions appears:
> “Navigation voice instructions”
Voice instructions for the navigation
system*
> “Air recirculation on / off”
To permanently shut off outside air, refer to AUC Automatic recirculated-air control on page 101
> “Mute on / off”
To mute the audio sources
> “Monitor on / off”
To switch the Control Display on/off
> “Telephone list”*
To show/hide the phone book or last displayed list of stored phone numbers > “Next entertainment source”
To change the audio source
5. Select the desired function and press the controller.
Operating the function
Press the button on the steering wheel. If you have programmed “Navigation voice instructions” for the button:
>
>
Switch voice instructions on/off: Press button longer.
To repeat the last voice instruction: Press the button.
MDrive
With MDrive you can configure several individual settings for your vehicle on the Control Dis
play and activate them with the
button on the steering wheel.
Configuring settings
With the ignition switched on you can set MDrive on the Control Display.
iDrive, for operating principle refer to page 16. 1. Press the
button.
This opens the start menu.
2. Press the controller to open the
menu. 3. Select “MDrive” and press the controller.
The functions contained in MDrive are displayed:
> “SMG Drivelogic”
Sequential Manual Transmission with Drivelogic: shifting modes and Drivelogic driving programs, refer to page 62
> “EDC”
Programs of the Electronic Damping Control, refer to page 83
> “DSC”
Dynamic Stability Control and
M Dynamic Mode, refer to page 81
> “POWER”
Programs of the M Engine Dynamics Control, refer to page 59
> “Backrest”*
Programs of the active backrest width adjustment, refer to page 44
> “Head-Up Display”*
Views of the Head-Up Display, refer to page 90
You can reset all settings for MDrive to the
default values:
> “Reset to default”
4. Select the desired function.
5. Press the controller.
6. Turn the controller to select the desired setting.
7.
“Unchanged” retains the current setting made outside of MDrive.
Press the controller.
The setting is stored for the remote control currently in use.
Activating settings
Press the
button on the steering wheel.
The indicator lamp in the instrument cluster lights up. The settings made on the Control Display for the functions
contained in MDrive are active.
Pressing the button again deactivates MDrive.
If the indicator lamp flashes after the button was pressed, MDrive was unable to
respond because the ABS Antilock Brake System or DSC Dynamic Stability Control are currently regulating driving stability. Press the
button again when the indicator lamp no longer flashes.<
Even with MDrive activated, you can change individual settings outside MDrive, e.g. with the buttons in the center console. To reactivate all settings made for MDrive on the Control Dis
play: press the
button twice.
Transporting children safely
The right place for children
Backrest width on front passenger seat
Do not leave children unattended in the vehicle, otherwise they could endanger themselves and other persons, e.g. by opening
the doors.<
Children always in the rear
Accident research shows that the safest place for children is on the rear seat.
Children younger than 13 years of age or with a height under 5 ft/150 cm may only be transported in the rear in child restraint systems which correspond to the age, weight and height of the child. Otherwise there is an
increased danger of injury in an accident.<
Children 13 years of age or older must wear a safety belt as soon as a suitable child restraint system can no longer be used due to their age, size and weight.
Exception for front passenger seat
Should it ever be necessary to use a child restraint system on the front passenger seat, the front and side airbags on the passenger side must first be deactivated. Otherwise,
there is an increased risk of injury for the child if
the airbags are triggered, even with a child
restraint system.<
For more information on automatic deactivation
of the front passenger airbags, refer to page 89.
Installing child restraint systems
Observe the child restraint system manufacturer's instructions for selection, installation and use of the child restraint systems. Otherwise the degree of protection may
be reduced.<
Open the backrest width setting of the front passenger seat all the way. After
mounting the child's seat, deactivate the active
backrest width adjustment and do not call up
any memory position. Otherwise this limits the
stability of the child's seat on the front passenger seat.<
1. After unlocking the vehicle, sit on the front passenger seat and close the door to call up the memory position.
2. Completely open the backrest width adjustment, refer to page 44.
3. Deactivate active backrest width adjustment, refer to page 44.
4. Install child's seat.
Child seat security
All rear safety belts and the safety belt for the front passenger can be locked against pulling out to secure child restraint systems.
Locking safety belt
1. Secure the child restraint system with the belt.
2. Pull out the belt webbing completely.
3. Allow the belt webbing to retract and pull taut against the child restraint system. The safety belt is locked.
Unlocking safety belt
1. Open the belt buckle.
2. Remove the child restraint system.
3. Allow the belt webbing to retract completely.
LATCH child restraint fixing system
LATCH: Lower Anchor and Tethers for CHildren.
Follow the system manufacturer's
instructions on installation and use of LATCH child restraint systems in order not to impair their protective function.<
Before attaching the LATCH child's seat, pull the belt away from the region of the child restraint fixing system.
Make sure that the LATCH mounts have
properly clicked into place and that the child restraint system is resting snugly against the backrest. Otherwise, the protective action may be impeded.<
Rear seats
The anchor points for the LATCH anchors are located at the positions indicated by arrows in the gap between the seat and the backrest.
Rear seats with through-loading system*
The anchor points for the LATCH anchors are located behind the indicated protective caps. Remove the cover caps before mounting the child's seat.
Child restraint system with tether strap
Only use the tether-strap mounting points to secure child restraint systems, otherwise the mounting points could be damaged.<
There are three additional mounting points for child restraint systems with a tether strap, refer to arrows. Fold the corresponding mounting point upward before using.
Placement of tether strap
Make sure that the upper retaining strap is not routed over sharp edges and does not twist on its way to the upper mounting point; otherwise, the belt may not properly secure the child restraint system in the event of an acci
dent.<
Outer rear seat
1 Direction of travel
2 Head restraints
3 Hook of upper retaining strap
4 Mounting point
5 Rear window shelf
6 Backrest
7 Upper retaining strap of child restraint system
Fold upward or remove covers before using the mounting points.
1. Slide the head restraint upward.
2. Thread the upper retaining strap between the head restraint supports.
3. Attach the retaining strap hook to the mounting point.
4. Slide the head restraint into the bottom position.
5. Pull the retaining strap taut.
Center rear seat
1. Fold the center armrest somewhat toward the front.
2. Guide retaining strap through the opening.
3. Fold back the center armrest.
4.
5.
Attach the retaining strap hook to the mounting point.
Pull the retaining strap taut.
On trips
If the vehicle is equipped with rear side airbags, make sure that children do not lean out of the child's seat towards the door panels. Otherwise injuries can be caused if the
side airbags are triggered.<
Child-safety locks for rear doors
Slide down the safety lever on the rear doors: the door can now be opened from the outside only.
Safety switch for power windows
Always press the safety switch for the power windows, refer to page 40, when children are riding in the rear of the vehicle.
Driving
Ignition lock
Inserting remote control into ignition lock
Insert the remote control all the way into the ignition lock.
Radio readiness switches on.
Some electronic systems/consumers are ready for operation.
Comfort access*
With comfort access, only insert the remote control into the ignition lock in exceptional cases, refer to page 38.
Removing remote control from ignition lock
Do not pull the remote control out of the ignition lock using force, as otherwise
Start/Stop button
Pressing the Start/Stop button switches the radio readiness or the ignition on and off.
Manual transmission: the engine starts
when you depress the brake pedal while pressing the Start/Stop button.
Sequential Manual Transmission: when you press the Start/Stop button with the brake depressed and the selector lever in position P or N, the engine starts.<
Radio readiness
Some electronic systems/consumers are ready for operation. The last information of the computer selected is displayed in the instrument cluster.
Radio readiness is switched off:
> damage may result.<
Before removing the remote control, first press it in as far as possible to release the locking device.
The ignition is switched off if it was still switched on.
>
when the remote control is removed from the ignition lock
Index
“…” Identifies Control Display texts used to select
individual functions and refers you to the page where these texts can be found.
A
ABS Antilock Brake
System 80
– indicator lamp 82
Accepted calls 184
Accessories 6
Accident, refer to Emergency request 231
Acoustic signal, refer to Check Control 72
Activated-charcoal filter for automatic climate
control 102
“Activation time” for parked car ventilation 103
Active front head restraints 46
Active seat ventilation 49
Adapter for spare key 30
Adaptive brake lamps, refer to Brake force display 88
Adaptive Head Light 95
“Add digits” in mobile phone mode 184
Additives
– coolant 215
– engine oil, refer to Approved engine oils 214
“Address book” in
navigation 134
Address for navigation
– deleting 135
– entering 126, 129
– selecting 135
– storing 134
– storing current position 134
“Add to address book” 134
“Add to destination
list” 129, 131
Adjusting active backrest width 44
Adjusting interior
temperature 99
Adjusting the tone during audio operation, refer to Tone control 151
Adjusting thigh support 44
“After door opened” 46
“After unlocking” 46
Airbags 88
– indicator/warning lamp 90
– indicator lamp for front passenger airbags 89
– sitting safely 43
Air distribution
– automatic 99
– manual 100
Airing, refer to Ventilation 102
Air recirculation
– AUC Automatic
recirculated-air control 101
– recirculated-air mode 101
Air recirculation, refer to Recirculated-air mode 101
“Air recirculation on / off” 52
Air supply, automatic climate control 98
Air volume 100
AKI, refer to Fuel quality 203
Alarm system 37
– avoiding unintentional alarms 37
– interior motion sensor 37
– switching off alarm 37
– switching off tilt alarm sensor and interior motion sensor 38
– tilt alarm sensor 37
“All channels” 162
“All doors” 32
Alloy wheels 219
All-season tires, refer to Winter tires 208
“All stations”, requesting in radio mode 154
Alterations, technical, refer to For your own safety 5
Altering stretch of road 142
“AM”, reception
range 150, 154
Antenna for mobile phone 176
Antifreeze
– coolant 215
– washer fluid 65
Anti-theft alarm system, refer to Alarm system 37
Anti-theft system, refer to Central lokking system 32
Approved axle loads, refer to Weights 239
Approved engine oils 214
Approved gross vehicle
weight, refer to Weights 239
Armrest, refer to Center armrest, rear 111
Around the center console 14
Around the steering wheel 10
Arrival time
– refer to Computer 69
– refer to Starting destination guidance 138
“Arrow display” in
navigation 139
“Arrow display pop-up
instructions” 125
Ashtray
– front 109
– rear 110
Assist, refer to
BMW Assist 191
Assistance systems, refer to Driving stability control systems 80
Assistance window 21
“Assist. window off” 22
AUC Automatic recirculatedair control 101
“Audio” 151, 153, 158
Audio 150
– controls 150
– switching on/off 150
– tone control 151
– volume 151
Audio device, external 108
Automatic
– air distribution 99
– air volume 99
– headlamp control 93
– service notification 193
– steering wheel
adjustment 45
– storing stations 156
Automatic car washes 118
Automatic climate control 98
– automatic air distribution 99
– parked car ventilation 102
– switching on and off 102
– ventilation in rear 102
Automatic closing of doors, refer to Automatic soft closing 35
Automatic curb monitor 50
Automatic lighting
– refer to Automatic headlamp control 93
– refer to Daytime running lamps 94
– refer to Interior lamps 97
– refer to Pathway lighting 94
– refer to Welcome lamps 93
Automatic lights
– refer to High-beam
assistant 95
Automatic low beams, refer to High-beam assistant 95
“Automatic programs” 99
Automatic soft closing 35
Automatic station search 155
“Automatic ventilation” 103
AUTO program for automatic climate control 99
“Auto Request” 193
“Autostore” on the
radio 154, 156
“AUX” 150, 170, 172
AUX-IN connection 170
“AUX IN” in audio mode 170
Average fuel consumption 69
– setting units 77
Average speed, refer to Computer 68
“Avoid ferries” in
navigation 137
“Avoid highways” in
navigation 137
Avoiding freeways for
navigation 136
Avoiding unintentional
alarms 37
“Avoid tollroads” in
navigation 137
Axle loads, refer to
Weights 239
“A – Z” 184
B
“Backrest” 53
Backrest contour, refer to
Lumbar support 44
Backrests, refer to Seats 43 Backrest width 44
Back seats, refer to Rear seats Backup lamps, replacing
bulbs 224
“Balance”, tone control 152 Band-aids, refer to First-aid
kit 232
Bass, refer to Tone
control 151
“Bass”, tone control 151
Battery, refer to Vehicle battery 230
– jump starting 232
Battery replacement
– remote control for comfort access 39
BC button, refer to
Computer 68
Being towed 233
Belts, refer to Safety belts 47
Beverage holder, refer to Cup holders 109
Blind, refer to Sun blinds 106
Blower, refer to Air
volume 100
“Bluetooth” 177
BMW
– Car Shampoo 220
“BMW Assist” 192, 193
BMW Assist 191
– activating 197
– BMW TeleServices 193
– concierge service 194
– contacting BMW Customer Relations 194
– displaying vehicle data 198
– offered services 191
– roadside assistance 192
– updating 196
BMW Assist My Info 195
“BMW Contact” 186
“BMW Contact
Numbers” 186
BMW homepage 4
BMW maintenance
system 216
“BMW Service settings” 196
BMW TeleServices 193
BMW TeleServices services
– displaying 194
– updating 194
BMW website 4
Bottle holder, refer to Cup holders 109
Bracket for telephone or mobile phone
– refer to Snap-in adapter 189
Brake assistant 80
Brake force display 88
Brake lamps
– replacing bulbs 224
– two-stage 88
Brake rotors
– breaking-in 116
– refer to Braking safely 117 Brakes
– ABS Antilock Brake
System 80
– brake assistant 80
– brake force display 88
– breaking-in 116
– CBC Cornering Brake
Control 80
– electronic brake-force
distribution 80
– handbrake 59
– refer to Braking safely 117
– warning lamps 13
Brake system 116
– brake pads 116
– breaking-in 116
– disk brakes 117
– warning lamp 82
Braking safely 117
Breakdown, M Mobility
System 225
Breakdown services, refer to Roadside Assistance 232
Breaking-in brake pads 116
Breaking-in the clutch 116
Breaking-in the differential, refer to Engine and
differential 116
Break-in period 116
“Brightness” 77, 92
Brightness of Control
Display 77
Button for starting engine, refer to Start/Stop button 57
Buttons on steering wheel 11
C
California Proposition 65 Warning 6
“Call” 184, 195
Call
– accepting 182
– displaying accepted 185
– ending 183
– in absence 185
– rejecting 183
– starting 183
Calling
– by entering phone
number 183
– from phone book 184
– from Top 8 list 185
– redialing 185
Can holder, refer to Cup holders 109
Capacities 239
Car battery, refer to Vehicle battery 230
“Car Data” 69
Care 218
– car-care products 218
– carpets 220
– car washes 218
– CD/DVD-player 221
– chrome components 219
– displays 220
– exterior 218
– fine wooden
components 220
– hand washing 219
– headlamps 219
– high-pressure cleaning jets 218
– interior 220
– leather 220
– light-alloy wheels 219
– paint 219
– plastic components 220
– rubber gaskets 219
– safety belts 220
– sensors and cameras 220
– upholstery and clothcovered paneling 220
– windows 219
– wiper blades 219
Cargo
– refer to Cargo loading 118
– securing 119
– securing with ski bag 112 Cargo bay
– capacity 239
– emergency release 36
– opening/closing, refer to Luggage compartment lid 35
– opening from inside 35
– opening from outside 36
– opening with remote
control 33
– socket 110
Caring for the vehicle
finish 219
Car key, refer to Keys/remote control 30
Car phone 176
– installation location, refer to Center armrest 107
– refer to Mobile phone 176
– refer to separate operating instructions
Car radio, refer to Radio 154
Car Shampoo 220
Car wash 118, 218
Catalytic converter, refer to Hot exhaust system 116
“Categories” 162
CBC Cornering Brake
Control 80
CBS Condition Based
Service 216
“CD” 150, 164
CD changer 164
– controls 150
– fast forward/reverse 168
– installation location 168
– random sequence 167
– repeating a track 167
– sampling tracks 166
– selecting a CD 164
– selecting a track 165
– switching on/off 150
– tone control 151
– volume 151
CD player 164
– controls 150
– fast forward/reverse 168 – random sequence 167
– repeating a track 167
– sampling a track 166
– selecting a track 165
– switching on/off 150
– tone control 151
– volume 151
Center armrest
– front 107
– rear 111
Center brake lamp 224
Center console 14
Central locking
– from inside 34
– from outside 32
Central locking system 32 – comfort access 38
Changes, technical, refer to For your own safety 5
Changes, technical, refer to Parts and accessories 6
Changing language on
Control Display 78
Changing scale for
navigation 140
Changing units of measure on Control Display 77
Changing wheels 207, 227
CHECK button 73
Check Control 72
“Check Control
messages” 74
Check Gas Cap 202
Checking the air pressure, refer to Tire inflation
pressure 204
Child restraint fixing system LATCH 55
Child restraint systems 54
Child-safety lock 56
Child seats, refer to
Transporting children
safely 54
Chime, refer to Check
Control 72
Chock 228
Chrome-plated parts 220 Chrome polish 220
Cigarette lighter 109
Cigarette lighter socket, refer to Connecting electrical devices 110
Cleaning your BMW, refer to Care 218
“Climate” 49, 99
Clock 68
– 12h/24h format 76
– hour signal 76
– setting time and date 76
Closing
– from inside 34
– from outside 32
Closing fuel filler cap 202
Clothes hooks 108
Cockpit 10
Cold start, refer to Starting engine 58
Comfort access 38
– replacing battery, remote control 39
Comfort area, refer to Around the center console 14
“Comfort” with EDC 83
“Communication” 182, 192, 1 93, 195
Compact Disc
– refer to CD changer 164
– refer to CD player 164
Compartment for remote control, refer to Ignition lock 57
Compartments, refer to Storage compartments 108
Compressed audio files 164
Computer 68
– clock 68
– displays on Control
Display 69
– hour signal 76
“Concert hall”, tone
control 153
“Concierge” 195
Concierge service 194
Condensation, refer to When vehicle is parked 117
Condition Based Service CBS 216
“Confirmation” 33
Confirmation signals for locking and unlocking 33
Connecting car vacuum cleaner, refer to Connecting electrical devices 110
Consumption, refer to
Average fuel
consumption 69
Consumption statistics, refer to Average fuel
consumption 69
“Continue guidance to
destination?” 139
Control Center, refer to
iDrive 16
Control Display, refer to iDrive 16
– setting brightness 77
– switching off/on 22
Controller, refer to iDrive 16
Controls, refer to Cockpit 10
Convenient operation
– glass sunroof 33
– windows 33
– windows and glass sunroof with comfort access 39
Coolant 215
– checking level 215
– temperature 67
Cooling, maximum 101
Cooling fluid, refer to
Coolant 215
Cooling function, automatic climate control 101
Cooling system, refer to
Coolant 215
Copyright 2
Cornering Brake Control CBC 80
Country of destination for navigation 127
Courtesy lamps 97
Cradle for telephone or mobile phone 107
Cruise control 65
Cruising range 69
Cup holders 109
Curb weight, refer to
Weights 239
Current position
– displaying 145
– entering 134
– storing 134
“Customer
Relations” 186, 194
Cylinders, refer to Engine data 238
D
Dashboard, refer to
Cockpit 10
Data, technical 238
– dimensions 238
– engine 238
– weights 239
Date
– date format 77
– setting 77
Daytime running lamps 94
“Deactivated” 46
Defect
– door lock 34
– fuel filler door 202
– glass sunroof 41
– luggage compartment lid 36
Defrosting windows 100
Defrosting windows and removing condensation 100
Defrosting windshield, refer to Defrosting windows 100
Defrost position, refer to Defrosting windows 100
“Delete address book” in navigation 136
“Delete all numbers” in mobile phone mode 185
“Delete data” in
navigation 136
“Delete” in mobile phone mode 185
Destination address
– deleting 135
– entering 126, 129
Destination for navigation – destination list 133
– entering via voice 129
– entry 126
– selecting from address book 135
– selecting using
information 132
– storing 134
Destination guidance 138
– bypassing route
sections 142
– canceling voice
instructions 52
– changing specified
route 136
– displaying route 139
– distance and arrival 138
– interrupting 138
– starting 138
– terminating/continuing 138
– voice instructions 141
– volume of voice
instructions 142
Destination list for
navigation 133
Destinations recently driven to 133
“Details” in audio
mode 166, 172
“Details” in radio mode 162
“Detour” in navigation 145
“Dial” in mobile phone
mode 183
“Dial number” 183
Digital clock 68
Digital radio, refer to High Definition Radio 158
Dimensions 238
Directional indicators, refer to Turn signals 63
Direction announcements, refer to Voice
instructions 141
Direction instructions, refer to Voice instructions 141
Directory, refer to Phone book 184
Directory for navigation, refer to Address book 134
Displacement, refer to Engine data 238
“Display” 77
Display, refer to iDrive
controls 16
Display elements, refer to Instrument cluster 12
Displaying vehicle data 198
Display lighting, refer to
Instrument lighting 97
“Display off” 22
Displays
– on Control Display, refer to iDrive 16
– refer to Instrument
cluster 12
“Display settings” 77, 90
Displays on the windshield, refer to Head-Up Display 90
Disposal
– battery of remote control with comfort access 39
– coolant 215
– vehicle battery 230
Distance, refer to
Computer 69
“Distance to dest.” 69
Distance to destination, refer to Computer 69
Distance warning, refer to PDC Park Distance
Control 79
Divided rear backrest, refer to Through-loading
system 111
Door entry lighting 97
Door key, refer to Keys/
remote control 30
Door lock 34
Door locking, confirmation signals 33
“Door locks” 32
Doors
– manual operation 34
– remote control 32
DOT Quality Grades 206 Draft-free ventilation 102
Drinks holder, refer to Cup holders 109
Drivelogic 62
Drive mode 61
“Driver’s door only” 32
Driving lamps, refer to Parking lamps/low beams 93
Driving programs, refer to Drivelogic 62
Driving route, refer to
Displaying route 139
Driving stability control
systems 80
Driving through water 117
Driving tips, refer to General driving notes 116
Dry air, refer to Cooling
function 101
Drying the air, refer to Cooling function 101
“DSC” 53, 81
DSC Dynamic Stability
Control 81
– indicator lamp 13, 81
– malfunction 82
DVD for navigation 124
Dynamic Brake Control DBC
– warning lamp 82
“Dynamic route” in
navigation 137
Dynamic Stability Control DSC 81
– M Dynamic Mode MDM 81
E
Easy entry/exit 51
– backrest width 45
“EDC” 53
EDC Electronic Damping
Control 83
Eject button, refer to Buttons in area of CD player 150
Electrical malfunction
– door lock 34
– driver’s door 34
– fuel filler door 202
– glass sunroof, electric 41
– luggage compartment lid 36
Electric steering wheel
adjustment 51
Electronic brake-force
distribution 80
Electronic Damper Control EDC
– “Comfort” 83
– “Normal” 83
– “Sport” 83
Electronic Damping Control EDC 83
Electronic oil level check 212
Emergency operation, refer to Manual operation
– door lock 34
– driver’s door 34
– fuel filler door 202
– luggage compartment lid 36
Emergency operation, refer to Moving manually
– glass sunroof 41
Emergency release for
luggage compartment lid in cargo bay 36
Emergency request 231
Emergency services, refer to Roadside Assistance 232
“Enabled services” 197
“Enabled TeleServices” 194
“Enable services” 197
“End call” 184
Engaging drive position, refer to Selector lever
positions 60
Engine
– breaking-in 116
– data 238
– M Engine Dynamic
Control 59
– overheated, refer to Coolant temperature 67
– speed 238
– starting 58
– starting, with comfort
access 38
– switching off 58
Engine compartment 211
Engine coolant 215
Engine oil
– adding 214
– additives, refer to Approved engine oils 214
– approved engine oil 214
– checking oil level 212
– electronic oil level check 212
– fast measurement 213
– interval between changes, refer to Service
requirements 70
– oil change 214
– oil grades, refer to Approved engine oils 214
– possible displays 212
– temperature 68
– temperature gauge 68
“Engine oil level” 213
Engine output, refer to Engine data 238
Engine overheating, refer to Coolant temperature 67
Engine speed, refer to Engine data 238
Engine starting, refer to
Starting engine 58
“Enter address” 126, 134
Entering destination via town/ city name 127
Entering intersection,
navigation 128
Entering the
address 126, 129
Entering town/city for
navigation 127
Entering zip code for
navigation 128
“Entertainment” 150
Entertainment sound output on/off 151
Entry map for destination 131
Equalizer, refer to Tone
control 153
“Equalizer”, tone control 153
“ESN” 161
ESP Electronic Stability Program, refer to DSC Dynamic Stability
Control 81
Event Data Recorders 217
Exhaust system, refer to Hot exhaust system 116
Exterior mirrors 50
– adjusting 50
– automatic dimming
feature 51
– automatic heating 50
– folding in and out 50
– tilting down passenger-side exterior mirror 50
External audio device 108
Eye for tow-starting and towing, refer to Tow
fitting 233
F
Fader, refer to Tone
control 152
Failure messages, refer to Check Control 72
False alarm
– refer to Avoiding
unintentional alarms 37
– refer to Switching off
alarm 37
Fastening safety belts, refer to Safety belts 47
– warning lamp 48
Fastest route for
navigation 136
“Fast route” in navigation 137
Filler neck for washer fluid 65
Filling bottle, refer to
M Mobility System 225
Filling sealant into wheel 226
Filter, refer to Microfilter/ activated-charcoal filter 102
First aid, refer to First-aid kit 232
First-aid kit 232
Flashing
– during locking/unlocking, refer to Setting confirmation signals 33
– triple turn signal
activation 63
Flat tire
– changing wheels 227
– Flat Tire Monitor 84, 85
– M Mobility System 85, 225
– refer to Tire condition 206
– spare wheel 228
– TPM Tire Pressure
Monitor 85
– warning lamp 85, 86
Flat Tire Monitor 84
– false alarms 84
– initializing system 84
– snow chains 208
– system limits 84
– warning lamp 85
Fluid reservoir, refer to Filler neck for washer fluid 65
“FM”, reception
range 150, 154
FM, waveband 154
Folding rear backrest 111
Fold-over rear backrest 111
Footbrake, refer to Braking safely 117
Footwell lamps, refer to Interior lamps 97
Forward, fast
– CD changer 168
– CD player 168
For your own safety 5
Freeway, refer to Route criteria 136
Front airbags 88
Front armrest, refer to Center armrest, front 107
Front passenger airbags – deactivating 89
Front seat adjustment 43 “FTM” 85
FTM, refer to Flat Tire
Monitor 84
Fuel 203
– average consumption 69
– display 68
– high-quality brands 203
– quality 203
– specifications 203
– tank contents, refer to Capacities 239
Fuel clock, refer to Fuel
gauge 68
Fuel consumption display, refer to Computer, average fuel consumption 69
Fuel display, refer to Fuel gauge 68
Fuel filler door 202
– releasing in the event of electrical malfunction 202
Full mobile phone preparation package 176
Full screen display, refer to Switching assistance
window off 22
Fuses 230
G
Garage door opener, refer to Integrated universal remote control 105
Gasoline, refer to Required fuel 203
Gasoline display, refer to Fuel gauge 68
Gear changes 62
Gear display, refer to Displays in instrument cluster 61
Gearshift lever 60
– manual transmission 59
General driving notes 116 Glass sunroof, electric 40
– convenient operation from outside 34
– convenient operation with comfort access 39
– moving manually 41
– remote control 33
Glove compartment 107
– lighting 107
GPS navigation, refer to Navigation system 124
Grills, refer to Ventilation 102
Gross vehicle weight, refer to Weights 239
Ground clearance 118
H
Handbrake 59
– indicator lamp 13, 59
Hands-free system, refer to
Microphone 14
Hand washing 219
Hazard warning flashers 15 “HD radio” 158
HD radio, refer to High
Definition Radio 158
Head airbags 88
Headlamp
– cleaning tank, refer to
Capacities 239
Headlamp control,
automatic 93
Headlamp flasher 63
Headlamps 93
– cleaning, refer to Wiper
system 64
– filler neck for washer
fluid 211
Head Light, refer to Adaptive
Head Light 95
Head restraints 46
– active front head
restraints 46
– removing 47
– sitting safely 43
“Head-Up Display” 53, 90 Head-Up Display 90
– default view 91
– M view 90
– shift lights 63
Heated
– mirrors 50
– rear window 100
– seats 48
– steering wheel 51
Heating 98
– exterior mirrors 50
– interior 98
– rear window 100
– residual heat 101
– seats 48
– steering wheel 51
Heating with engine switched
off, refer to Residual
heat 101
Heavy cargo, refer to Securing
cargo 119
Height, refer to
Dimensions 238
Height adjustment
– seats 44
– steering wheel 51
High-beam assistant 95, 97 High beams 95
– headlamp flasher 95
– indicator lamp 13
High Definition Radio 158 High-pressure cleaning
jets 218, 219
High water, refer to Driving
through water 117
Hills 117
Holder for cups 109
“Home address” in
navigation 136
Homepage of BMW 4
Hood 210
Horn 10
Hot exhaust system 116 “Hour memo” 76
“House number” in
destination entry 129
Hydraulic brake assistant,
refer to Brake assistant 80 Hydroplaning 117
I
IBOC, refer to High Definition Radio 158
Ice, refer to Outside
temperature warning 68
ID3 tag, refer to Information on track 166
Identification mark
– recommended tire
brands 208
– tire coding 205
Idle 61
iDrive 16
– assistance window 21
– automatic climate control with expanded scope 99
– changing date and time 76
– changing language 78
– changing menu page 20
– changing settings 75
– changing units of measure and display type 77
– confirming selection or entry 20
– controller 16
– controls 16
– displays, menus 18
– operating principle 18
– selecting menu item 20
– setting brightness 77
– start menu 18
– status information 21
– symbols 19
Ignition 57
– switched off 58
– switched on 57
Ignition key, refer to Keys/ remote control 30
Ignition key position 1, refer to Radio readiness 57
Ignition key position 2, refer to Ignition on 57
Ignition lock 57
– starting engine with comfort access 39
i menu 18
Imprint 2
Indicator/warning lamps
– ABS Antilock Brake
System 82
– airbags 90
– brake system 82
– DSC 13, 81
– Flat Tire Monitor 85
– high beams 13
– MDrive 13, 53
– M Dynamic Mode 13, 81
– parking lamps/low beams 13
– safety belt warning 48
– TPM Tire Pressure
Monitor 86
Indicator and warning
lamps 13
Inflation pressure, refer to Tire inflation pressure 204
Inflation pressure monitoring, refer to Flat Tire Monitor 84
Inflation pressure monitoring, refer to TPM Tire Pressure Monitor 85
Info menu 18
Information
– on another location 132
– on current position 132
– on destination location 132
“Information” in
navigation 132
Information menu, refer to imenu 18
“Information on
destination” 134
“Info sources” 71
Initializing
– Flat Tire Monitor 84
– radio, refer to Storing
stations 156
– refer to Power failure 230
– refer to Setting time and date 76
– seat, mirror and steering wheel memory 45
“Input map” 131
Installation location
– CD changer 168
– drive for navigation DVD 124
– mobile phone 107
Instructions for navigation system, refer to Voice instructions 141
Instrument cluster 12
Instrument illumination, refer to Instrument lighting 97
Instrument lighting 97
Instrument panel, refer to Cockpit 10
Instrument panel, refer to Instrument cluster 12
Integrated key 30
Integrated universal remote control 105
Interesting destination for navigation 132
“Interim time” 75
Interior lamps 97
– switching on with remote control 33
Interior motion sensor 37
– switching off 38
Interior rearview mirror 51
– automatic dimming
feature 51
Intermittent mode of the wipers 64
J
Jacking points 228
Joystick, refer to iDrive 16 Jumpering, refer to Jump
starting 232
Jump starting 232
K
Keyless-Go, refer to Comfort access 38
Keyless opening and closing, refer to Comfort access 38
Key Memory, refer to Personal Profile 31
“Keypad” 186
Keys 30
– key-related settings, refer to Personal Profile 31
– spare key 30
Knock control 203
L
Lamps
– refer to High-beam
assistant 95
– refer to Parking lamps/low beams 93
Lamps and bulbs 222
“Language / Units” 77, 78
“Language / Units” in
navigation 125, 141
“Languages” 78
“Languages” in
navigation 125, 141
Lashing eyes, refer to
Securing cargo 119
Last destinations, refer to Destination list 133
“Last seat pos.” 46
LATCH child restraint fixing system 55
Leather care 220
LEDs light-emitting
diodes 222
Length, refer to
Dimensions 238
License plate lamp, replacing bulbs 225
Light-emitting diodes
LEDs 222
Lighter 109
“Lighting” 64
Lighting
– instruments 97
– lamps and bulbs 222
– of the vehicle, refer to
Lamps 93
Light switch 93
“Limit” 74
Loading
– securing cargo 119
– stowing cargo 119
– vehicle 118
Load securing equipment, refer to Securing cargo 119
“Lock after driving” 35
Lock buttons in the doors, refer to Lokking 35
Locking 33
– confirmation signals 33
– from inside 35
– from outside 33
– without key, refer to Comfort access 38
Locking and unlocking doors
– confirmation signals 33
– from inside 34
– from outside 32
Low beams 93
– automatic 93
– indicator lamp 13
Lower back support, refer to Lumbar support 44
Lug bolts 228
– tightening torque, refer to After mounting 229
– wrench 228
Luggage compartment lid 35
– emergency release 36
– locking with remote
control 33
– opening from inside 35
– opening from outside 36
– opening with remote
control 33
– unlocking and locking from inside 34
Luggage compartment lid/ tailgate
– comfort access 39
Luggage rack, refer to Roofmounted luggage rack 119
Lumbar support 44
LW, waveband 154
M
M Dynamic Mode MDM 81 – indicator lamp 13, 81
M Engine Dynamic Control 59 – “P 400″ 60
– “P 500″ 60
– “P 500 Sport” 60
M Mobility System 225
M+S tires, refer to Winter
tires 208
Maintenance 216
– refer to Service and
Warranty Information
Booklet for US models 216
– refer to Service
requirements 70
– refer to Warranty and
Service Guide Booklet for Canadian models 216
Maintenance system 216
Malfunction warnings, refer to Check Control 72
Manual air distribution 100
“Manual” in radio mode 155
Manual operation
– door lock 34
– driver’s door 34
– fuel filler door 202
– glass sunroof 41
– luggage compartment lid 36
Manual transmission 59
– tow-starting 234
“Map direction of travel” 140
Map display 140
“Map facing north” 140
Map for navigation
– changing scale 140
– destination entry 131
Map view facing north 140
Master key, refer to Keys/ remote control 30
Maximum cooling 101
Maximum speed with winter tires 208
MDM, refer to M Dynamic Mode 81
MDrive 52
“M Dynamic Mode” 81
Measurements, refer to Dimensions 238
Memory, refer to Seat, mirror and steering wheel
memory 45
MENU, button refer to Start menu 18
Menus, refer to iDrive 16
Message list for traffic
information 143
Microfilter 102
Microphone
– for telephone 14
– for voice command
system 14
Mirror dimming feature 51
Mirrors 50
– automatic curb monitor 50
– folding in and out 50
– heating 50
– memory, refer to Seat, mirror and steering wheel
memory 45
“Missed calls” 184
Missed calls 185
Mobile phone
– accepted calls 185
– adjusting volume 182
– calling 183
– ending call 183
– installation location, refer to Center armrest 107
– missed calls 185
– operation by voice 187
– operation via iDrive 182
– redialing 185
– refer to separate operating instructions 107
– Top 8 185
– touch tone dialing, refer to Tone dialing method 186
Mobile phone battery 190
Mobility System 225
Monitor, refer to iDrive 16
Monitoring pressure of tires, refer to Flat Tire Monitor 84
“Monitor on / off” 52
Most recent mobile phone numbers 185
MP3
– compressed audio files 164
– USB-audio interface/mobile phone audio interface 171
Multi-function steering wheel, refer to Buttons on steering wheel 11
Multifunction switch
– refer to Turn signals/
headlamp flasher 63
– refer to Wiper system 64
Music tracks
– finding 166
– random play sequence 167
– sampling, scan 166
“Mute on / off” 52
M view 91
MW, waveband 154
“My Info” 196
My Info, refer to BMW Assist My Info 195
N
“Navigation” 69, 126
Navigation destination
– entering manually 126 – home address 136
– selecting via map 131
Navigation drive, installation
location 124
Navigation DVD 124
Navigation instructions, refer
to Switching voice
instructions on/off 141 Navigation system 124
– address book 134
– bypassing route
sections 142
– destination entry 126
– destination guidance in
assistance window 124 – destination list 133
– displaying current
position 145
– displaying route 139
– entering a destination
manually 126
– entering destination via
voice 129
– last destinations 133
– navigation DVD 124
– route list 141
– searching for a special
destination 132
– selecting destination using
information 132
– selecting destination via
map 131
– selecting route criteria 136 – starting destination
guidance 138
– switching off, refer to
Terminating/continuing
destination guidance 138 – terminating/continuing
destination guidance 138 – voice instructions 141 – volume adjustment 142 “Navigation voice
instructions” 52, 141
Neck support, refer to Head
restraints 46
“New address” in
navigation 134
“New destination” 126, 131 New remote control 30
“New route” 142
New wheels and tires 207 “Next entertainment
source” 52
“Normal” with EDC 83
Nozzles, refer to Windshield
washer nozzles 65
Nylon rope, refer to Towstarting and towing 233
O
OBD socket, refer to Socket for Onboard Diagnostics interface 217
Octane ratings, refer to Fuel specifications 203
Oil, refer to Engine oil 212
Oil change intervals
– refer to Service
requirements 70
Oil temperature 68
“On a new destination” in navigation 132
Onboard computer, refer to iDrive 16
“Onboard info” 69
Onboard toolkit 222
“On destination” 132
“On location” 132
Opening and closing
– comfort access 38
– from inside 34
– from outside 32
– using remote control 32
– using the door lock 34
Operating principle, iDrive 18
Operation by voice for mobile phone 187
– adjusting volume 188
– canceling 187
– commands 187
– correcting phone
number 188
– dialing phone number 188
– placing a call 188
– redialing 189
– voice phone book 188
“Options” 195, 197
Orientation menu, refer to Start menu 18
Output, refer to Engine
data 238
Outside air, refer to AUC Automatic recirculated-air control 101
Outside temperature
display 68
– changing unit of measure 77
– in computer 77
Overview
– operating principle 18
– radio control 150
– screen display 21
P
“P 400″ 60
“P 500″ 60
“P 500 Sport” 60
Panic mode 33
Park Distance Control PDC 79 “Parked car operation” 103 “Parked car ventilation” 103 Parked car ventilation 102 – activating activation
time 103
– preselecting activation
times 103
– switching on and off
directly 103
Parked car ventilation system – LED 98
Parking, vehicle 58
Parking aid, refer to PDC Park
Distance Control 79
Parking assistant, refer to
PDC Park Distance
Control 79
Parking brake, refer to
Handbrake 59
Parking lamps 93
– indicator lamp 13
Parking lamps/low beams – indicator lamp 13
Parts and accessories 6
Passenger-side exterior
mirror, tilting down 50
Pathway lighting 94
“PDC” 80
“PDC display on” 80
PDC Park Distance Control 79 Personal Profile 31
“Perspective” 140
“Phone” 178, 180, 183
Phone book 182
– changing entry 184
– creating and editing voice
phone book 188
– deleting all entries 185 – deleting entry 185
– dialing phone number 184 Phone numbers
– deleting from phone
book 185
– dialing 183
– most recent numbers 185 – selecting in phone book 185 – Top 8 185
Pinch protection system – glass sunroof, electric 41 – power windows 40
Plasters, refer to First-aid
kit 232
Plug-in unit for remote
control, refer to Ignition
lock 57
Polish 220
Pollen, refer to Microfilter/
activated charcoal filter 102 Position, refer to Displaying
current position 145
Position, refer to Storing
current position 134
“POWER” 53
POWER, refer to M Engine
Dynamic Control 59
Power failure 230
Power windows, refer to
Windows 39
Preselecting activation times
of the parked car
ventilation 103
“Presets” in radio
mode 154, 162
Pressure, tires 204
– producing with M Mobility
System 225
Pressure monitoring of tires,
refer to TPM Tire Pressure
Monitor 85
“Profile” 198
Programmable button on
steering wheel 51
Programmable memory
buttons 22
Programming button function,
refer to Programmable
button on steering wheel 51 Protective function, refer to
Pinch protection system – glass sunroof, electric 41 – windows 40
R
Radio
– autostore 156
– controls 150
– High Definition Radio 158 – sampling stations 155 – satellite radio 161
– selecting frequency
manually 155
– selecting
waveband 150, 154
– station search 155
– station selection 154
– station with the best
reception 156
– storing stations 156
– switching on/off 150
– tone control 151
– volume 151
– weatherband, refer to
Weather news flashes 158 Radio key, refer to Keys/
remote control 30
Radio position, refer to Radio
readiness 57
Radio readiness 57
– switched off 58
– switched on 57
– with comfort access 39 Radio stations
– storing 156
Rain sensor 64
“Random”, random play
sequence 167
“Random all” in audio
mode 168
“Random directory” in audio
mode 168
“RDS” 157
Reading lamps 97
Rear armrest, refer to Center
armrest, rear 111
Rear lamps, refer to Tail
lamps 224
– replacing bulbs 224
Rear seats
– adjusting head restraints 47 – folding over backrest 111 – heating 49
– removing head restraints 47 Rear socket 110
Rear ventilation 102
Rearview mirror 50
Rear window
– heating 100
– roller sun blind, refer to Sun
blinds 106
Rear window safety switch 40 “Received calls” 184
Reception
– quality 157
– radio stations 157
– regional station 156
Reception level of mobile
phone, refer to Status
information 21
Recirculated-air mode 101 – air recirculation 101
– AUC Automatic
recirculated-air control 101 Reclining seat, refer to
Seats 43
Recording times, refer to
Stopwatch 75
Redialing with mobile
phone 189
“Redial” in mobile phone
mode 184
Reflectors, refer to Tail
lamps 224
Refueling 202
Releasing
– hood 210
Releasing the locks, refer to
Unlocking 38
“Relock door if not
opened” 35
Remaining distance, refer to
Cruising range 69
Remaining distance to
destination, refer to
Computer 69
Remote control 30
– comfort access 38
– garage door opener 105 – luggage compartment lid 33 – malfunction 33, 39
– replacing battery 39
Removing condensation on
the windows 100
“Repeat directory” in audio
mode 167
“Repeat” in audio mode 167 “Repeat track” in audio
mode 167
Replacement fuses 230
Replacement of tires, refer to
Changing wheels 227
Replacement remote control,
refer to New remote
controls 30
Replacing bulbs, refer to
Lamps and bulbs 222
Replacing tires 207
Replacing wheels/tires, refer
to New wheels and tires 207 Reporting safety defects 7 Reserve
– warning, refer to Fuel
gauge 68
“Reset” 85, 86
Reset, refer to Resetting tone
settings 153
“Reset” the stopwatch 75 “resetting FTM …” 85
“Reset to default” with
MDrive 53
“Reset” tone settings 153 Residual heat 101
Restraint systems
– for children 54
– refer to Safety belts 47 Retreaded tires 207
Reverse, fast
– CD changer 168
– CD player 168
Reverse gear 61
– manual transmission 59 Road map 140
Roadside
Assistance 186, 192, 232 Roadside parking lamps 95 Roof load capacity 239
Roof-mounted luggage
rack 119
Rope, refer to Tow-starting
and towing 233
Rotary/pushbutton, refer to
iDrive 16
Route 136
– bypassing sections 142 – changing 142
– changing criteria 136
– displaying 139
– displaying arrow display 139 – displaying map view 140 – displaying streets or towns/
cities 141
– selecting 136
Route information, refer to
Destination guidance with
voice instructions 141
Route map, refer to Displaying
map view 140
“Route preference”,
changing 136
Route selection 136
S
Safety 5 Safety belts 47
– damage 48
– sitting safely 43
– warning lamp 48
Safety belt tensioners
– refer to Airbags 88
– refer to Safety belts 47 Safety systems
– ABS Antilock Brake
System 80
– airbags 88
– driving stability control
systems 80
– safety belts 47
Satellite radio
– enabling channel 161
– selecting channel 162
– storing channel 162
satellite radio 161
“SAT” in radio mode 150, 161 “Save current
destination” 136
“Scan”
– music tracks on CD 166 – stations in radio mode 155 Scan
– CD changer 166
– CD player 166
– radio 155
“Scan all” in audio mode 166 “Scan directory” in audio
mode 166
Screen, refer to iDrive 16 Screw thread for tow
fitting 233
SDARS, refer to Satellite radio 161
“Seat heater distribution” 49 Seats 43
– active backrest width
adjustment 44
– adjusting backrest width 44
– adjusting height 44
– adjusting shoulder
support 44
– adjusting the seats 43
– adjusting thigh support 44
– easy entry/exit 45
– heating 48
– lumbar support 44
– memory, refer to Seat, mirror and steering wheel
memory 45
– shoulder support 44
– sitting safely 43
– storing the setting 45
– ventilation, refer to Active seat ventilation 49
Securing load
– refer to Securing cargo 119
– with ski bag, refer to
Securing cargo 112
“Select as
destination” 132, 195
“Select current speed” 75
Selecting audio sources, refer to Operation via iDrive 150
Selecting frequency
manually 155
Selecting menu items 20
Selecting route 136
Selection options with
navigation system 136
Sequential Manual
Transmission with
Drivelogic 60
– Drivelogic driving
programs 62
– idle 61
– initializing system, refer to After changing wheels/ tires 208
– reverse gear 61
– Sequential mode 61
– shift lights 63
– shiftlock 61
– towing 234
– tow-starting 235
Sequential mode 61
Service, refer to Roadside Assistance 232
Service and Warranty
Information Booklet for US models 216
“Service Info” 71, 193, 213
Service Interval Display
– refer to CBS Condition Based Service 216
– refer to Service
requirements 70
“Service Request” 186, 193
“Service
requirements” 71, 193, 213
Service requirements 70
– refer to CBS Condition Based Service 216
“Set date” 77
“Set” in audio mode 150
“Set” on trip computer 70
“Set service date” 72
“Set time” 76
Setting button, refer to
Controls, controller 16
“Settings” 198
Settings
– changing on Control
Display 75
– clock, 12h/24h mode 76
– configuring, refer to
MDrive 52
– configuring, refer to
Personal Profile 31
– date 77
– language 78
– units of measure 77
“Settings” in unlocking 32
Settings menu, refer to
imenu 18
“Settings” with BMW
Assist 196
“Settings” with MDrive 53
Setting time, refer to
Preselecting activation times 103
Shifting 62
Shifting into drive position, refer to Selector lever positions 60
Shift lights 63
Shiftlock 61
Shift paddles on steering wheel 62
Shock absorber control, refer to EDC Electronic Damping Control 83
Short commands of voice command system 240
“Short route” in
navigation 137
Short route in navigation, refer to Selecting route 136
Shoulder support 44
“Show current position” 132
“Show destination
position” 132
Shuffled, refer to Random
– CD changer 167
– CD player 167
Side airbags 88
Side marker lamps, replacing bulbs 224
Side-mounted turn signals, replacing bulbs 224
Side window blinds, refer to Sun blinds 106
Signal horn, refer to Horn 10
Sitting safely 43
– with airbags 43
– with head restraint 43
– with safety belts 43
Ski bag 112
Sliding/tilt sunroof, refer to Electric glass sunroof 40
Slope assistant, refer to Starting off on uphill
slopes 82
SMG, refer to Sequential Manual Transmission with Drivelogic 60
“SMG Drivelogic” 53, 62
Snap-in adapter
– mounting/removing 189
– using 176
Snow chains 208
Socket for Onboard
Diagnostics interface 217
Socket for remote control, refer to Ignition lock 57
Sockets, refer to Connecting electrical devices 110
Soft closure aid, refer to Automatic soft closing 35
Song search on CD, refer to Sampling tracks 166
SOS, refer to Initiating an emergency request 231
Sound distribution in audio mode
– front/rear fader 152
– right/left balance 152
Spare
– adapter for spare key 30
– fuses 230
– key 30
– wheel, driving with spare wheel 229
– wheel, refer to Changing wheels 227
Spare wheel, refer to
Changing wheels 227
Special oils, refer to Approved engine oils 214
Specified oil grades, refer to Approved engine oils 214
Speed
– limit 74
Speed-dependent
volume 152
Speed limit warning, refer to Speed limit 74
Speedometer 12
“Speed volume”, tone
control 152
Speed with winter tires 208
“Sport” with EDC 83
Stability control, refer to Driving stability control systems 80
Start/Stop button 57
– starting the engine 58
– switching off the engine 58
“Start” for stopwatch 75
“Start guidance” 129, 138
Starting, refer to Starting engine 58
Starting assistance, refer to Jump starting 232
Starting assistant, refer to Starting off on uphill
slopes 82
Starting difficulties, refer to Jump starting 232
Starting off
– clutch protection with
manual transmission 83
– on a slippery surface 83
– on uphill slopes 82
Start menu, iDrive 18
“Start route guidance” 132
“Start service” 192
“Start service” with BMW Assist 195
“State / Province” in
destination entry 127
“State inspection” 72
Station, refer to Radio 154 “Status” 71
Status information on Control Display 21
Status of this Owner’s Manual at time of printing 5
Steam cleaners 218, 219
Steering wheel
– adjustment 51
– automatic adjustment, refer to Steering wheel
memory 45
– buttons on steering
wheel 11
– easy entry/exit 51
– heating 51
– lock, refer to Ignition lock 57
– MDrive button 52
– memory 45
– programmable button 51
– shift paddles 62
“Steering wheel button” 52
“Stop” for stopwatch 75
Stopwatch 75
Storage compartments 108
“Store in address book” in navigation 134
“Store” in radio
mode 157, 163
Storing 221
Storing current position 134
Storing radio stations 156
Storing sitting position, refer to Seat, mirror and steering wheel memory 45
Storing tires 208
Storing your vehicle 221
“Street” in destination
entry 128
Summer tires, refer to Wheels and tires 204
Sun blinds 106
“Surround Settings”, tone control 152, 153
SW, waveband 154
Switches, refer to Cockpit 10
Switching automatically between high beams and low beams, refer to Highbeam assistant 95
Switching off engine 58
Switching on
– audio 150
– CD changer 150
– CD player 150
– radio 150
Switching on hour signal 76
Swiveling
– headlamps, refer to Adaptive Head Light 95
Symbols 4
– indicator/warning lamps 13
– navigation system 144
– status information 21
– traffic information with navigation system 142
T
Tachometer 67
Tail lamps 224
– replacing bulbs 224
Tank contents, refer to
Capacities 239
Target cursor for
navigation 131
Technical alterations, refer to For your own safety 5
Technical data 238
– capacities 239
– dimensions 238
Telematics, refer to
BMW Assist 191
Telephone
– installation location, refer to Center armrest 107
– refer to Mobile phone 176 “Telephone list” 52
Temperature
– adjusting in upper body region 99
– adjusting with automatic climate control 99
– changing units of
measure 77
– refer to Coolant
temperature 67
Temperature display
– changing units of
measure 77
– outside temperature
warning 68
Temperature gauge
– engine oil 68
Tempomat, refer to Cruise control 65
“Text language” 78
“Theater”, tone control 153 The individual vehicle 5
Third brake lamp, refer to Center brake lamp 224 Through-loading system 111 Tightening torque of the lug bolts, refer to After
mounting 229
Tilt alarm sensor 37
– switching off 38
Tilting down passenger-side exterior mirror 50
“Time” 76
“Time format” 76
Timer, refer to Preselecting activation times 103
“Timer 2″ for parked-car ventilation 103
“Timer 1″ for parked-car ventilation 103
Tire inflation pressures 204 Tire pressure
– loss 85, 86
Tire Pressure Monitor
TPM 85
Tire Quality Grading 206 Tire replacement
– new wheels and tires 207 Tires
– age 205
– air loss 85, 86
– breaking-in 116
– changing 207
– condition 206
– damage 207
– flat tire, refer to Changing wheels 227
– inflation pressure 204
– M Mobility System 225 – new wheels and tires 207 – pressure monitoring, refer to Flat Tire Monitor 84
– pressure monitoring, refer to TPM Tire Pressure
Monitor 85
– replacing 227
– retreaded tires 207
– size 205
– tread 206
– wear indicators 206
– wheel/tire combination 207 – winter tires 208
Tire trouble
– changing wheels 227
TMC station, refer to Traffic information 142
“Tone” 151
Tone dialing method 186 Tone in audio mode
– adjusting 151
– middle setting 153
Tone on locking/unlocking 33 Tools, refer to Onboard
toolkit 222
“Top 8″ in mobile phone mode 184
Torque
– refer to Engine data 238 Torque, lug bolts, refer to After mounting 229
Touch tone dialing, refer to Tone dialing method 186 Tow bar 234
Tow fitting 233
Towing 233
– methods 234
– tow fittings 233
– with manual
transmission 234
– with Sequential Manual Transmission 234
– with Sequential Manual Transmission with
Drivelogic 234
“Town / City” in destination entry 127
Tow rope 234
Tow-starting 233
“TPM” 86
TPM Tire Pressure
Monitor 85
– resetting system 86
– system limits 85
– warning lamp 86
Tracks
– random sequence 167 – sampling on CD 166
– selecting with CD 165
Traction control, refer to DSC Dynamic Stability
Control 81
Traffic information for
navigation
– depiction in route map 144 – displaying 143
– during destination
guidance 145
– symbols 144
Traffic information with
navigation 142
“Traffic Info settings” 143 Traffic jam
– displaying traffic
information 142
– refer to Bypassing route sections 142
Transmission
– breaking-in 116
– Drivelogic 62
– idle 61
– manual transmission 59 – reverse gear 61
– Sequential Manual
Transmission with
Drivelogic 60
– shift lights 63
– starting assistant, refer to Starting off on uphill
slopes 82
– towing 233
– tow-starting 234
Transporting children
safely 54
Transport securing device, refer to Securing cargo 119 Tread depth, refer to Minimum tire tread 206
Treble, refer to Tone
control 151
“Treble”, tone control 151 Trip computer 70
Trip-distance counter
– refer to Trip computer 70 “Triple turn signal” 64
Trip meter
– also refer to Trip
computer 70
Trunk, refer to Cargo bay Turning circle, refer to
Dimensions 238
Turning lamps 95
– replacing bulbs 223
Turn signals 63
– indicator lamp 12
– replacing bulbs 224
U
“Unchanged” 53, 62
Uniform Tire Quality Grading/
UTQR 206
“Units” 77
Units
– average fuel
consumption 77
– temperature 77
Universal garage-door
opener, refer to Integrated universal remote
control 105
Universal remote control 105 “Unlock button” 32
Unlocking
– from inside 35
– from outside 32
– setting unlocking
behavior 32
– without key, refer to Comfort
access 38
Unlocking without key, refer to
Comfort access 38
“Update services” 197
Upshift display, refer to Shift
lights 63
USB-audio interface/mobile
phone audio interface 171 “USB” in audio mode 172 “Use current location as
address” 134, 136
Used batteries
– refer to Disposal 230
– refer to Replacing battery 39 Using turn signals 63
V
Valve screw caps, refer to After mounting 229
Vehicle
– battery 230
– breaking-in 116
– loading 118
– measurements, refer to Dimensions 238
– parking 58
– weights 239
“Vehicle / Tires” in
unlokking 32
Vehicle care, refer to Care 218
Vehicle jack 228
– jacking points 228
Vehicle position, refer to Displaying current
position 145
Ventilation 102
– draft-free 102
– in rear 102
– while stationary 102
Venting, refer to
Ventilation 102
Vent outlets 98
– refer to Ventilation 102
Vent outlets of automatic climate control 98
Vents, refer to Ventilation 102
“Vent settings” 100
Viscosity 214
Voice, refer to Destination guidance with voice
instructions 141
Voice command system
– overview 24
– short commands 240
Voice instructions for
navigation system 141
– muting 52
– repeating 52, 142
– switching on/off 52, 141
– volume 142
Voice phone book 188
Volume 150
– audio sources 150
– cargo bay 239
– fuel tank, refer to
Capacities 239
– mobile phone 182
– setting speed
dependent 152
– voice instructions 142
– windshield cleaning system, refer to Capacities 239
W
Warning lamps, refer to Indicator and warning lamps 13
Warning messages, refer to Check Control 72
Warning triangle 231
Warranty and Service Guide Booklet for Canadian
models 216
Washer fluid 65
– capacity of the reservoir 65
Waste container, refer to Ashtray 109
Water on roads, refer to Driving through water 117
Water penetration 218, 219
Waveband for radio 154
“WB” 150, 158
Wear indicators in tires, refer to Minimum tread depth 206
Weather news flashes 158
Website BMW 4
Weights 239
Welcome lamps 93
“Welcome light” 94
Wheel/tire combination, refer to New wheels and tires 207
Wheel/tire damage 207
Wheelbase, refer to
Dimensions 238
Wheels and tires 204
Width, refer to
Dimensions 238
Windows 39
– convenient operation 33
– convenient operation from outside 34
– convenient operation with comfort access 39
– safety switch 40
Windshield
– cleaning, refer to Wiper system 64
– defrosting, refer to
Defrosting windows 100
– displays, refer to Head-Up Display 90
Windshield wash
– automatic, refer to Rain sensor 64
– capacities, reservoir 239
– filler neck for washer
fluid 211
– washer fluid 65
– windshield washer
nozzles 65
– wiper system 64
Windshield wipers, refer to Wiper system 64
– wiper blade
replacement 222
Winter tires 208
– setting speed limit 74
– storage 208
Wiper blades
– replacement 222
Wiper system 64
– rain sensor 64
– washer fluid 65
– windshield washer
nozzles 65
“With highways” in
navigation 137
Word matching principle for navigation 137
Working in the engine
compartment 210
Wrenches/screwdrivers, refer to Onboard toolkit 222
X
Xenon lamps 222 – replacing bulbs 222
Y
Your individual vehicle
– programmable button on steering wheel 51
– settings, refer to MDrive 52
– settings, refer to Personal Profile 31


 2009 BMW M5 Owners Manual, 2009 - Enlarge page 1 of 266
 2 of 266
 3 of 266
 4 of 266
 5 of 266
 6 of 266
 7 of 266
 8 of 266
 9 of 266
 10 of 266
 11 of 266
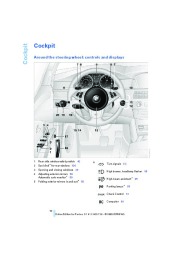 12 of 266
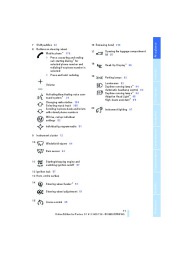 13 of 266
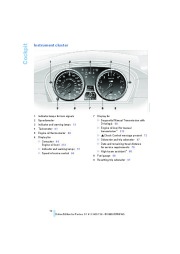 14 of 266
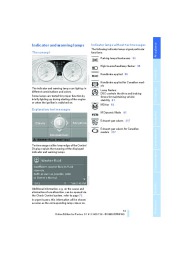 15 of 266
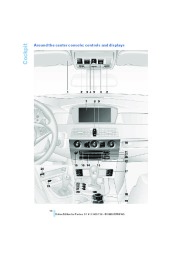 16 of 266
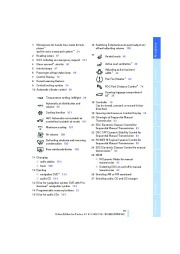 17 of 266
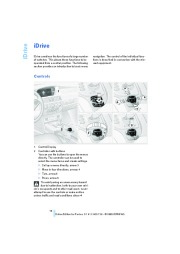 18 of 266
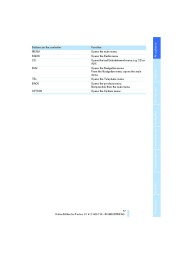 19 of 266
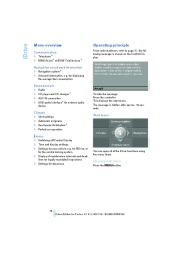 20 of 266
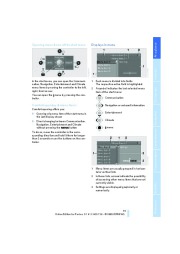 21 of 266
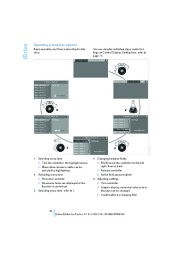 22 of 266
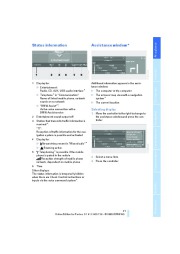 23 of 266
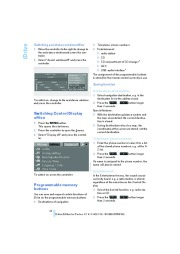 24 of 266
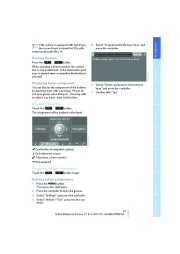 25 of 266
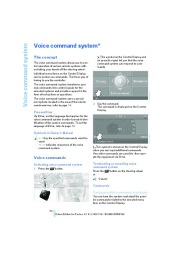 26 of 266
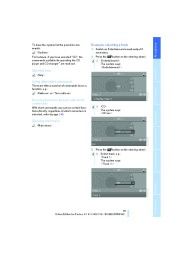 27 of 266
 28 of 266
 29 of 266
 30 of 266
 31 of 266
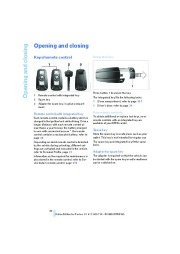 32 of 266
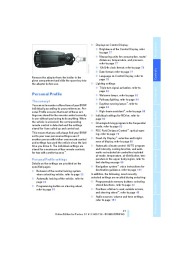 33 of 266
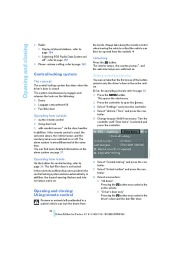 34 of 266
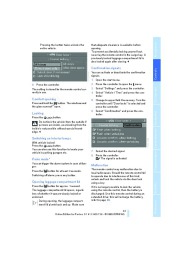 35 of 266
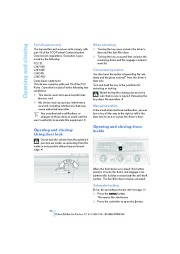 36 of 266
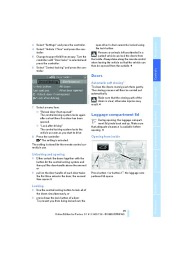 37 of 266
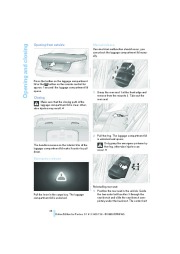 38 of 266
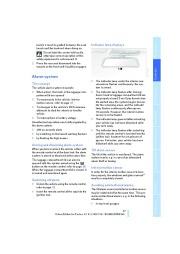 39 of 266
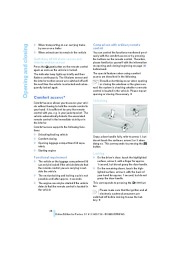 40 of 266
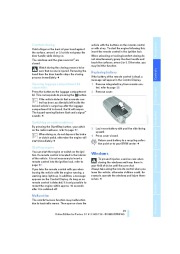 41 of 266
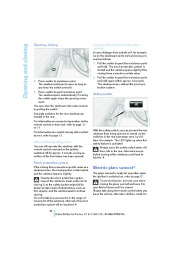 42 of 266
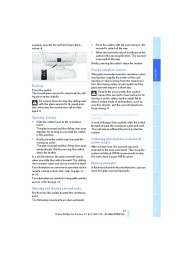 43 of 266
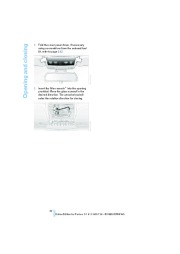 44 of 266
 45 of 266
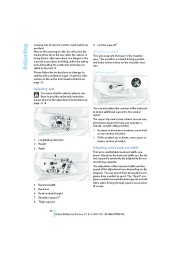 46 of 266
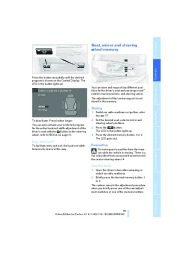 47 of 266
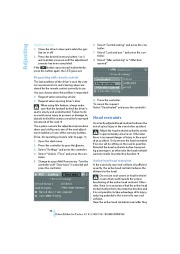 48 of 266
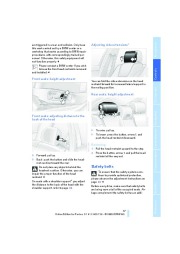 49 of 266
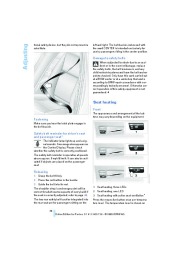 50 of 266