From inside (document excerpt):
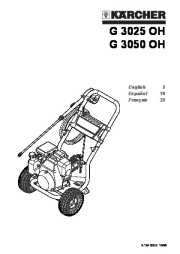
G 3025 OH G 3050 OH English Español Français 2 16 32 9.139-202.0 10/06 HIGH PRESSURE WASHER OPERATOR MANUAL Model Overview Important Safety Instructions Assembly Instructions Operating Instructions Using the Accessories Working with Detergents Taking a Break Shutting Down & Clean-Up Winterizing and Long-Term Storage Maintenance Instructions Cleaning Tips Troubleshooting minor or moderate injury or in property damage incidents.
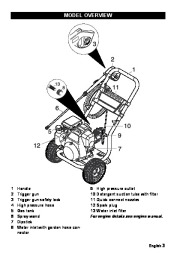
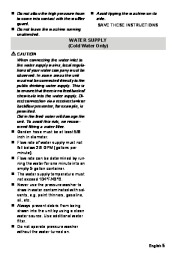
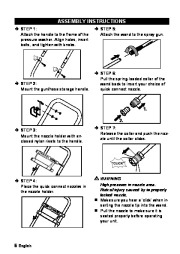
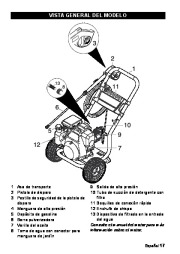
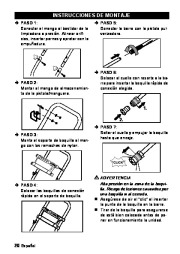
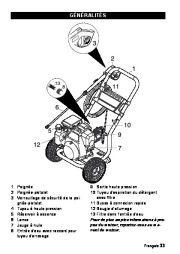
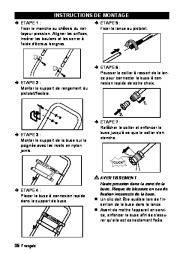
Owner/User Responsibility The owner and/or user must have an understanding of the manufacturer’s operating instructions and warnings before using this pressure washer. Warning information should be emphasized and understood. If the operator is not fluent in English, the manufacturer’s instructions and warnings shall be read to and discussed with the operator in the operator’s native language by the purchaser/owner, making sure that the operator comprehends its contents. Owner and/or user must study and maintain for future reference the manufacturers’ instructions. Specifications Operating pressure 3000 PSI Water volume Detergent suction Engine Part No. Part No. Serial no. 2.5 GPM 0.15 – 0.20 GPM 187cc Honda GC 190 1.194-516.0 G 3025 OH 1.194-515.0 G 3050 OH Kärcher Customer Support USA Call: 1-800-537-4129 for help or visit our website: www.karcher-usa.com/home Please take a moment to register your pressure washer online at www.karcher-usa.com/warranty Safety Alert Symbols DANGER indicates “an imminently hazardous situation which, if not avoided, will result in death or serious injury. ” WARNING indicates “a potentially hazardous situation which, if not avoided, could result in death or injury. ” CAUTION indicates “a potentially hazardous situation which, if not avoided, may result in Kärcher Customer Service CDN Call: 1-800-537-4129 for help or visit our website: www.karcher-canada.com Kärcher Customer Support Mexico Call: 01-800-024-13-13 for help or visit our website: www.karcher.com.mx 2 English MODEL OVERVIEW 1 2 3 4 5 6 7 8 Handle Trigger gun Trigger gun safety lock High pressure hose Gas tank Spray wand Dipstick Water inlet with garden hose connector 9 High pressure outlet 10 Detergent suction tube with filter 11 Quick connect nozzles 12 Spark plug 13 Water inlet filter For engine details see engine manual. English 3 IMPORTANT SAFETY INSTRUCTIONS Read the operating instructions of the engine manufacturer before start-up and follow the safety instructions carefully. WARNING When using this product basic precautions should always be followed, including the following: Read all the instructions before using the product. To reduce the risk of injury, close supervision is necessary when a product is used near children. Know how to stop the product and bleed pressures quickly. Be thoroughly familiar with the controls. Stay alert watch what you are doing. Do not operate the product when fatigued or under the influence of alcohol or drugs. Keep operating area clear of all persons. Do not overreach or stand on unstable support. Keep good footing and balance at all times. Wear safety goggles. Follow the maintenance instructions specified in the manual. WARNING Risk of Injection or Injury Do Not Direct Discharge Stream At Persons. High pressure jets can be dangerous if misused. The jet must not be directed at persons, animals, electrical devices, or the unit itself. Do not spray electrical connections, electrical outlets or fixtures. WARNING Risk Of Explosion Do not spray flammable liquids. Do not use acids, alkaline, solvents, or any flammable material in this product. These products can cause physical injuries to the operator and irreversible damage to the machine. WARNING Gun Kicks Back Hold with both hands. The Trigger Gun Safety Lock prevents the trigger from accidentally being engaged. This safety feature DOES NOT lock trigger in the ON position. WARNING The engine exhaust from this product contains chemicals known to the State of California to cause cancer, birth defects or other reproductive harm. CAUTION Risk of Asphyxiation Use this product only in a well ventilated area. Operate and fuel machine in a well ventilated area, free of devices featuring an open pilot or flame such as boilers, water heaters, etc. CAUTION Risk of Fire Do not add fuel when the product is operating. Do not operate if fuel has been spilled. Instead, move the machine to a different location and avoid creating sparks. The machine has hot surfaces which can cause burns. Operate the unit in a safe environment and away from children. Do not touch hot surfaces or allow accessories to contact hot surfaces. 4 English Do not allow the high pressure hose to come into contact with the muffler guard. Do not leave the machine running unattended. Avoid tipping the machine on its side. SAVE THESE INSTRUCTIONS WATER SUPPLY (Cold Water Only) CAUTION When connecting the water inlet to the water supply mains, local regulations of your water company must be observed. In some areas the unit must not be connected directly to the public drinking water supply. This is to ensure that there is no feedback of chemicals into the water supply. Direct connection via a receiver tank or backflow preventer, for example, is permitted. Dirt in the feed water will damage the unit. To avoid this risk, we recommend fitting a water filter. Garden hose must be at least 5/8 inch in diameter. Flow rate of water supply must not fall below 2.8 GPM (gallons per minute). Flow rate can be determined by running the water for one minute into an empty 5-gallon container. The water supply temperature must not exceed 104°F/40°C. Never use the pressure washer to draw in water contaminated with solvents, e.g. paint thinners, gasoline, oil, etc. Always prevent debris from being drawn into the unit by using a clean water source. Use additional water filter. Do not operate pressure washer without the water turned on. English 5 ASSEMBLY INSTRUCTIONS STEP 1: Attach the handle to the frame of the pressure washer. Align holes, insert bolts, and tighten with knobs. STEP 5: Attach the wand to the spray gun. STEP 2: Mount the gun/hose storage handle. STEP 6: Pull the spring-loaded collar of the wand back to insert your choice of quick connect nozzle. STEP 3: Mount the nozzle holder with enclosed nylon rivets to the handle. STEP 7: Release the collar and push the nozzle until the collar clicks. STEP 4: Place the quick connect nozzles in the nozzle holder. WARNING High pressure in nozzle area. Risk of injury caused by improperly locked nozzle. Make sure you hear a `click’ when inserting the nozzle tip into the wand. Pull the nozzle to make sure it is seated properly before operating your unit. 6 English STEP 8: Attach the high pressure hose to the spray gun. OPERATING INSTRUCTIONS CAUTION Do not run the engine with a high or low oil level as this can cause engine damage.


 Kärcher Owners Manual - Enlarge page 1 of 61
 2 of 61
 3 of 61
 4 of 61
 5 of 61
 6 of 61
 7 of 61
 8 of 61
 9 of 61
 10 of 61
 11 of 61
 12 of 61
 13 of 61
 14 of 61
 15 of 61
 16 of 61
 17 of 61
 18 of 61
 19 of 61
 20 of 61
 21 of 61
 22 of 61
 23 of 61
 24 of 61
 25 of 61
 26 of 61
 27 of 61
 28 of 61
 29 of 61
 30 of 61
 31 of 61
 32 of 61
 33 of 61
 34 of 61
 35 of 61
 36 of 61
 37 of 61
 38 of 61
 39 of 61
 40 of 61
 41 of 61
 42 of 61
 43 of 61
 44 of 61
 45 of 61
 46 of 61
 47 of 61
 48 of 61
 49 of 61
 50 of 61