From inside (document excerpt):
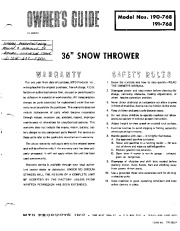
Model Nos. 190-768 191-768 10 CENTS 36 ” SNOW THROWER For one year from date of purchase, MTD Products Inc 1. Know the controls and how to stop quickly-READ THE OWNER’S MANUAL. 2. Disengage power and stop motor before cleaning discharge, removing obstacles, making adjustments, or when leaving operation position. 3. Never direct discharge at bystanders nor allow anyone in front of machine-debris may be hidden in the snow. 4. Keep children and pets a safe distance away. 1 will replace for the original purchaser, free of charge, F.O.B.
Snow Blower and Snow Thrower User Manual Free Download. Snow Removal Operator’s Manual. Free Manual Download PDF.
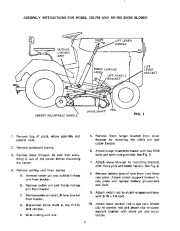
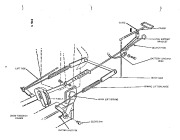
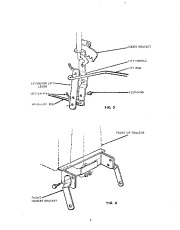
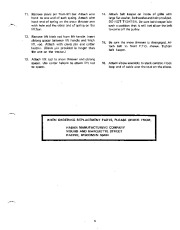
factory or authorized service firm, any part or parts found to be defective in material or workmanship. All transportation charges on parts submitted for replacement under this warranty must be paid by the purchaser. This warranty does not include replacement of parts which become inoperative through misuse, excessive use, accident, neglect, improper maintenance or alterations by unauthorized persons. This warranty does not include the engine, motor, battery, battery charger or any component parts thereof. For service on these units refer to the applicable manufacturer’s warranty. The above warranty will apply only to the original owner and will be effective only if the warranty card has been properly processed. It will not apply where the unit has been used commercially. Warranty service is available through your local authorized service dealer or distributor. UNDER NO CIRCUMSTANCES WILL THE RETURN OF A COMPLETE UNIT BE ACCEPTED BY THE FACTORY UNLESS PRIOR WRITTEN PERMISSION HAS BEEN EXTENDED. 5. Do not allow children to operate machine nor allow adults to operate it without proper instruction. 6. Adjust height to clear gravel or i:rushed rock surface. , 7. 8. Exercise caution to avoid slipping or falling, especially when operating in reverse. Handle gasoline with care – it is highly flammable. A. Use approved gasoline container. B. Never add gasoline to a running motor – fill tank out of doors and wipe up spilled gasoline. C. Replace gasoline cap securely. D. Open door if motor is run in garage – exhaust gases are dangerous. 9. Disengage ail clutches and shift into neutral before starting motor. Keep hands, feet and clothing away from power driven parts. 10. Use a grounded three wire extension cord for all plugin electric units. 11. Keep machine in good operating condition and keep safety devices in place. MTD PRODUCTS INC · 5389 WEST BOth ST. · P.O BOX 2Hl · CLEVELAND, OHIO 44111 FORM NO. 770-2862A ASSEMBLY INSTRUCTIONS FOR MODEL 190-768 AND 191-768 SNOW BLOWER HEIGHT ADJUSTABLE HANDLE FIG. 1 1. Remove bag of parts, elbow assembly and control rods. 2. 3. Remove cardboard inserts. Remove snow thrower. Be sure that everything is out of the carton before discarding the carton. Remove cutting unit from tractor. A. B. C. Remove cotter pin and outside linkage arm from tractor. Remove cotter pin and Inside linkage arm from tractor. Remove cotter pin and Lift lever bracket from tractor. 5. Remove front hanger bracket from snow thrower by removing the clevis pin and cotter hairpin. 6. Attach hanger bracket to tractor with four 5/16 bolts and sems nuts provided. See Fig. 3. 7. Attach snow thrower to mounting brackets with clevis pins and cotter hairpin. See Fig. 2. 8. Remove battery ground wire from Left Hand side plate. Attach clutch support bracket to side plate and replace battery ground wire and bolt.
Wikipedia’s page for MTD Products
Publisher: www.mtdproducts.com


 MTD 190-768 191-768 36-Inch Snow Blower Owners Manual - Enlarge page 1 of 8
 2 of 8
 3 of 8
 4 of 8
 5 of 8
 6 of 8
 7 of 8
 8 of 8